Do you feel like your Windows 10 or 11 PC takes ages to install a new app or get things done? Does it feel like it’s taking more time than it should compared to when you brought the PC? Are you getting ‘low on virtual memory’ errors on your PC? You might not ever have a clue what exactly virtual memory is because all we know is that the PCs have RAM and ROM (HDD or SSD or hybrid) to begin with.
Low virtual memory errors are pretty common across systems that are aged. You can say that as your PC gets older, it loses its flair taking ages to install an app or say, uninstall it. The system might crawl slowly as it gets older but what’s the reason?
The culprit could be ‘low virtual memory’ as that can render your system’s ability to process information and crawl instead of run. But what’s virtual memory and how can you increase it?
What is Virtual Memory on a PC?
When you buy a PC, you get a fixed RAM storage such as 8GB, 16GB, 32GB or higher with its respective generation and speeds. It’s volatile and gets overwritten repeatedly as you carry on using the PC. There’s also HDD or SDD which is the actual storage where you keep all your information secured until you delete it.
As said, you bought a PC with specific RAM storage which is used to run apps and programs as the system uses it as a temporary junction before hardcoding it on the actual storage. Since RAM storage is finite, you might run out of RAM when using too many apps or programs or if a certain app is consuming too much RAM such as Google Chrome. That’s when the system uses virtual memory which functions as RAM but the system uses a chunk from SSD or HDD temporarily.
Even though both RAM and virtual memory serves the same function, the latter is comparatively slower. Your Windows PC uses a function called paging file that takes a chunk from HDD/SDD while the configured capacity is called the virtual memory such as 1280MB.
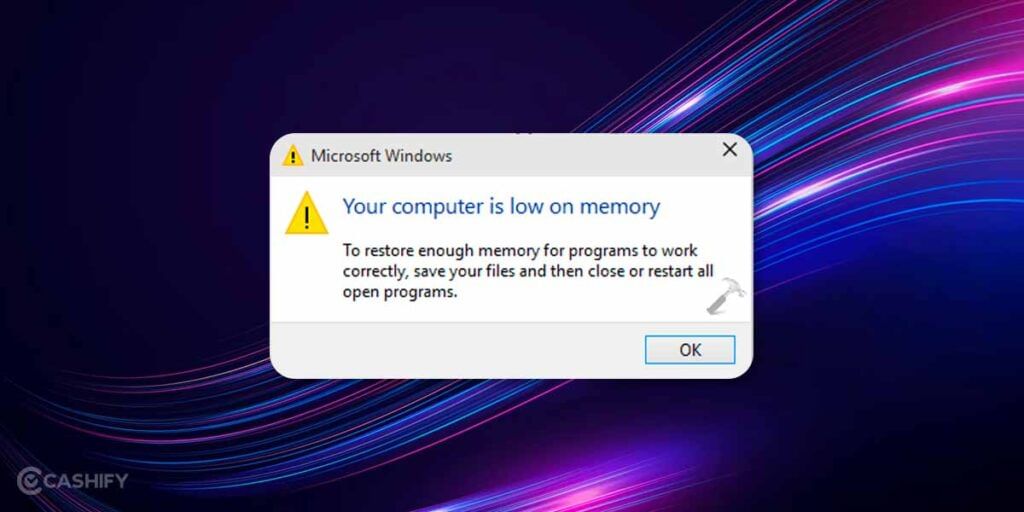
Once you run out of it too, that’s where you get ‘Out of Virtual Memory’ or ‘Low Virtual Memory’ kind of errors. It can lead to poor system performance and error messages keep popping up unless you fix the problem. One of the possible fixes is to increase virtual memory. Let’s discuss its feasibility and how you can do it.
Should You Modify Virtual Memory on Windows PC?
The burning question is, should you change virtual memory on your Windows PC? Generally, increasing paging files and virtual memory is considered a temporary method to fix the ‘low on virtual memory’ issue. It isn’t a long-term or permanent method but just a pit stop until you upgrade your PC’s actual RAM storage.
Increasing virtual memory may offer additional RAM storage at your disposal. However, it leads to instabilities and the system might often crash. Your PC would render slower than usual and that’s because of a large paging file.
Also Read: How To Update Graphics Driver In Windows 11?
How To Increase Virtual Memory on a PC?
Because most systems nowadays are running Windows 10 or Windows 11, let’s see how you can increase virtual memory on your PC by keeping these two operating systems as focal points.
1. Increasing Virtual Memory using system settings
1.1 Increase Virtual Memory on Windows 10:
Here you have a Windows 10 PC with ‘low on virtual memory’ or ‘out of virtual memory’ errors popping repeatedly. Let’s see the procedure to increase virtual memory.
1. Head over to the Control Panel on your device and navigate through System and Security >> System.
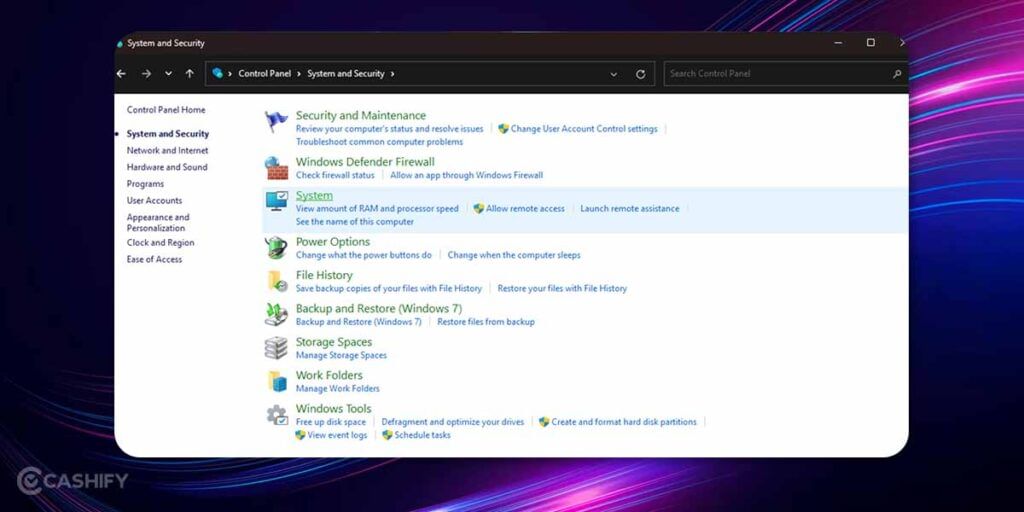
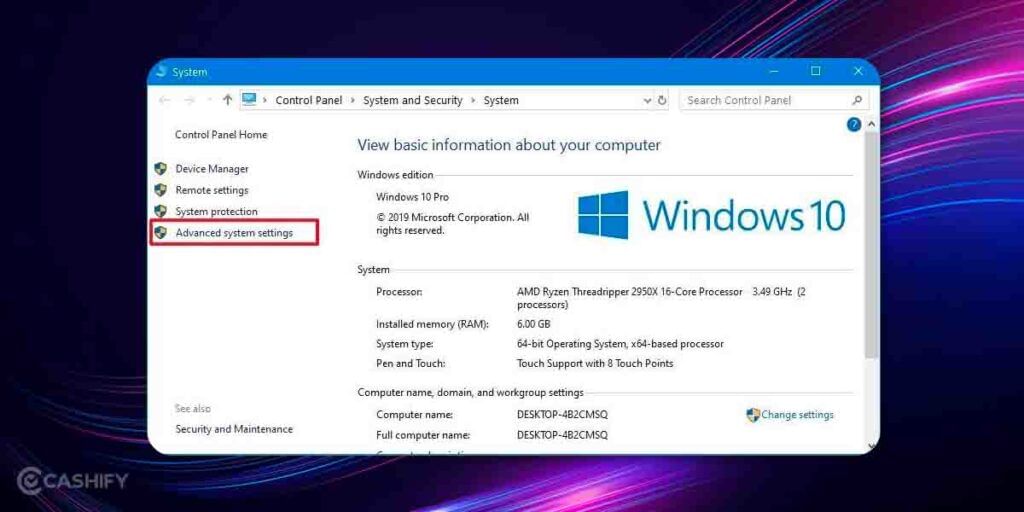
2. Next, proceed to Advanced System Settings >> open System Properties and go ahead on the Advanced tab on the dialog box.
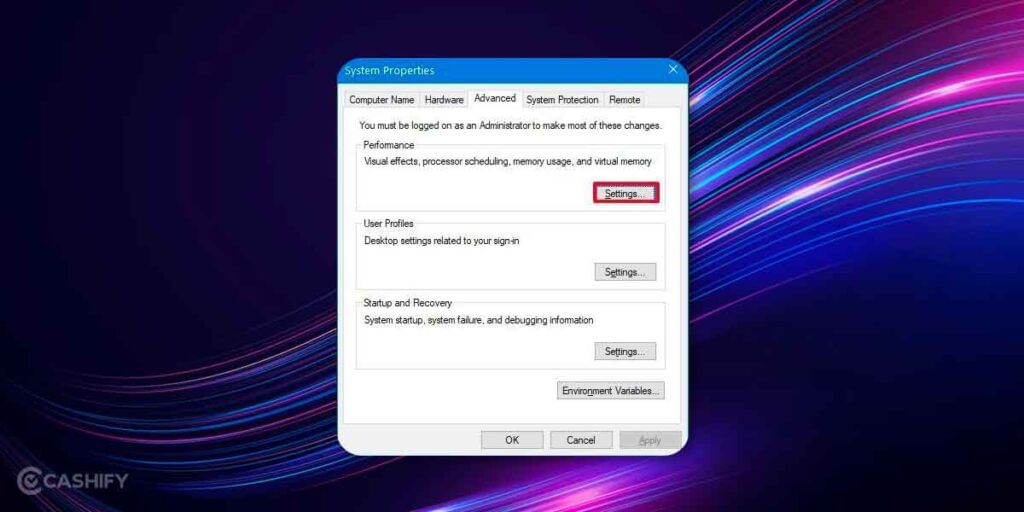
3. Under Performance, you need to click on Settings >> tap on the Advanced tab.
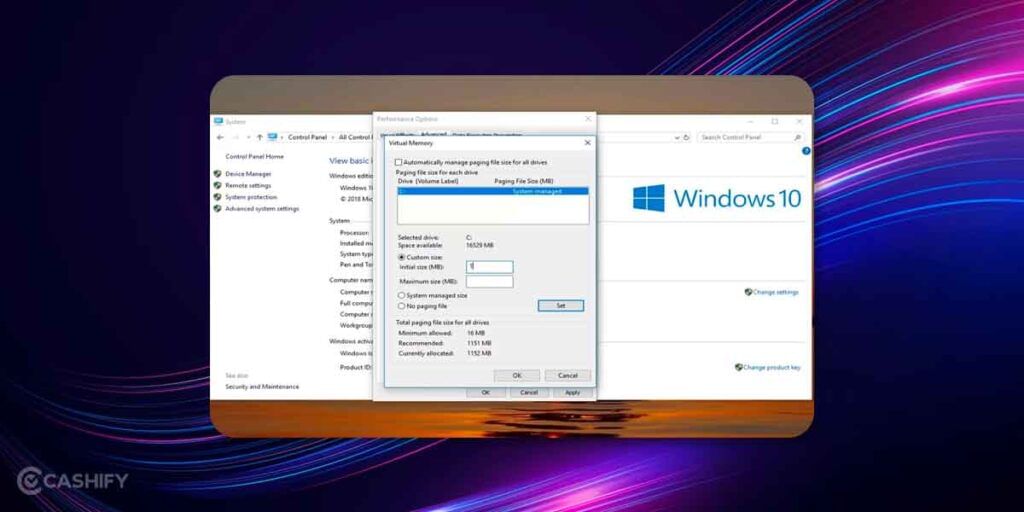
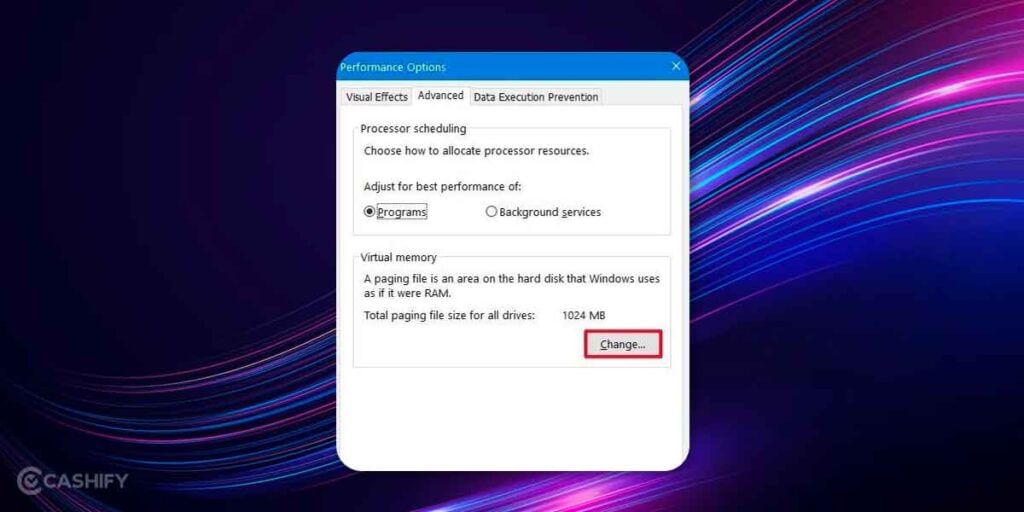
4. Head over to the Virtual Memory section where you need to click on Change.
5. You will find the current, allocated, and recommended paging file size where you need to select Custom Size to set it yourself.
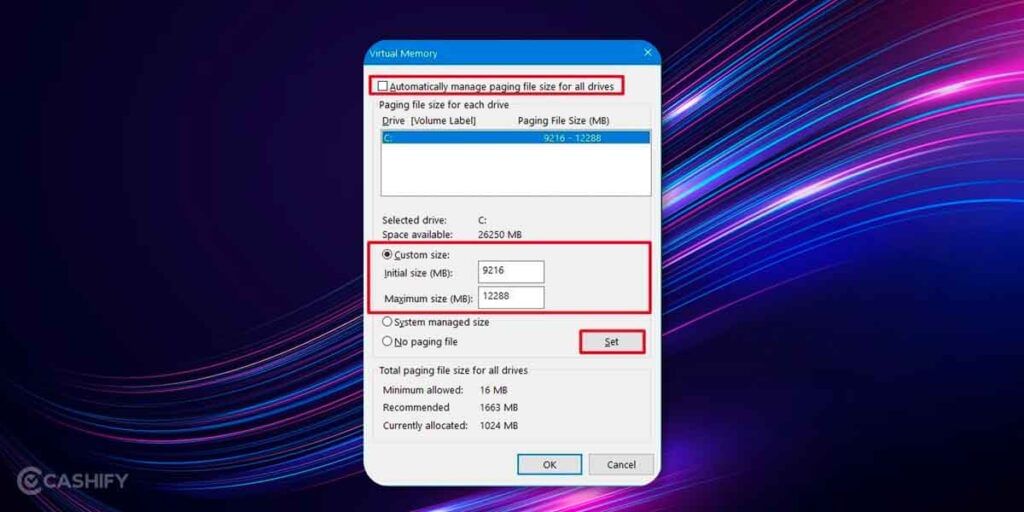
6. Save all the settings and that’s where you should get rid of ‘low on virtual memory’ error.
Also Read: Best Screen Recorders For Windows PC
1.2 Increase Virtual Memory on Windows 11:
Let’s see how you can increase the virtual memory on Windows 11.
1. First, press the Windows button + I which will take you to the Settings page.
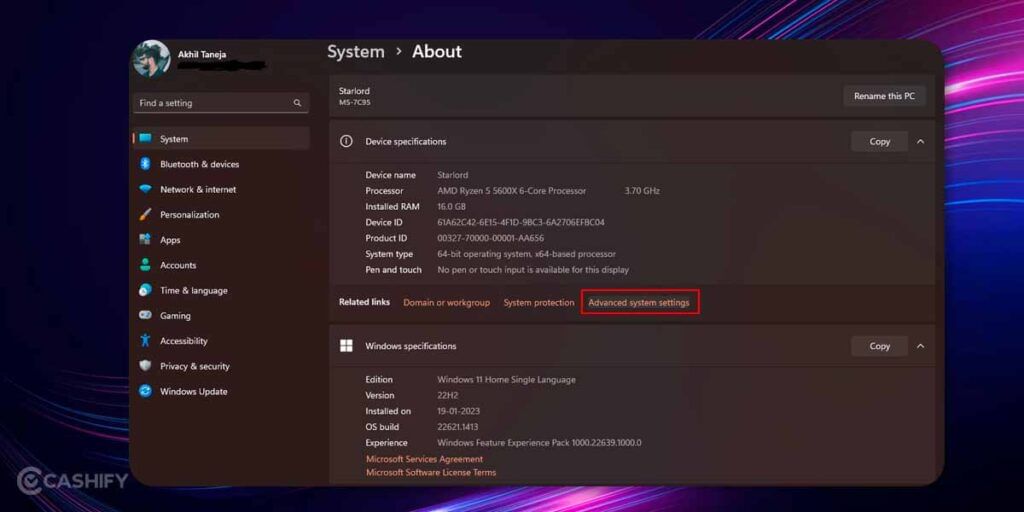
2. Next, head over to the System >> About >> Advanced System Settings.
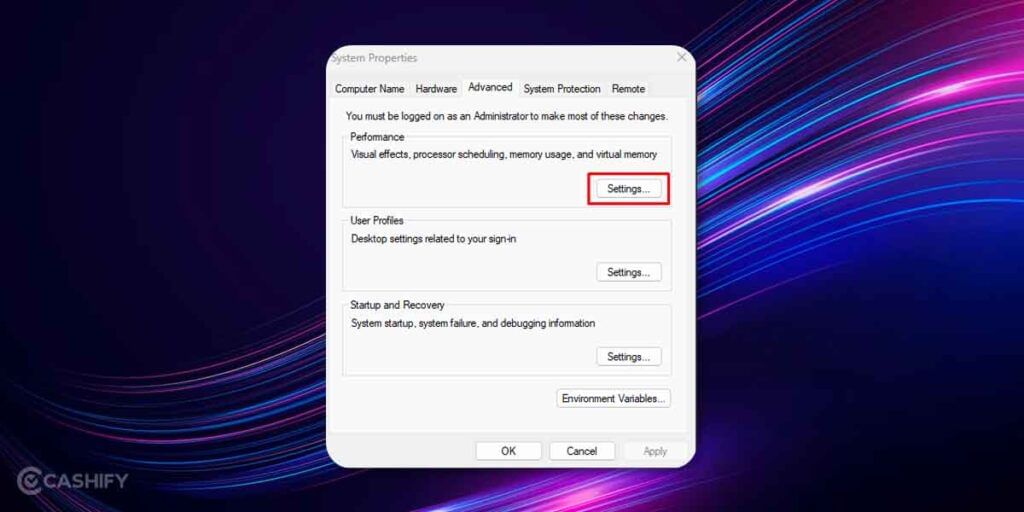
3. A dialog box will be on-screen so head over to the ‘Advanced’ tab, and tap on Settings under the Performance section.
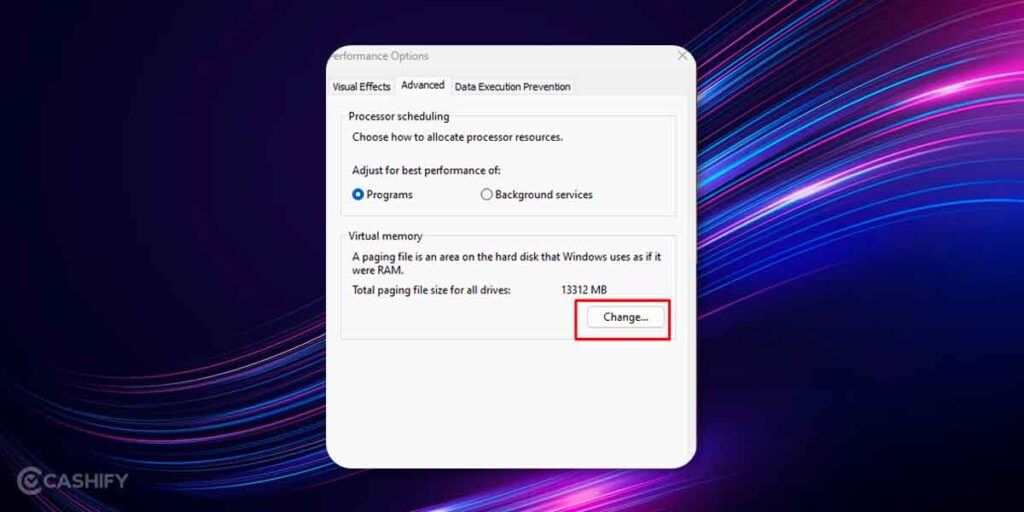
4. You will see a section called ‘Performance Options’, and under “Advanced” look for “Virtual Memory” section and check for the total paging file size and click on ‘Change’ under the same.
5. The next section gives you the minimum allowed, recommended, and currently allocated paging file size. Now to modify the Virtual Memory size, uncheck the checkbox that says “Automatically manage paging file size for all drives”
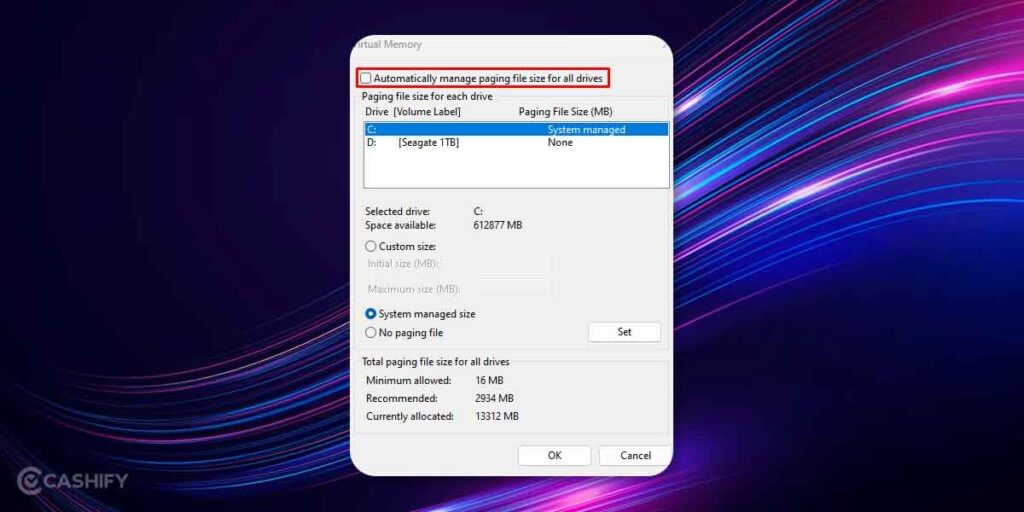
6. Now turn On the radio button called ‘Custom Size’ and put an increased file size that you want to set.
6. Save the settings and you should be able to operate apps and features on your Windows 11 PC with ease and without the ‘Low on Virtual Memory’ error.
Also Read: Windows 11 Tips And Tricks That You Should Not Miss
2. Increase Virtual Memory on a PC using CMD
Let’s have a look at how you can modify the paging file size on your PC using Command Prompt (CMD).
1. Tap on Start on the taskbar or the Windows button on your keyboard and launch Command Prompt and run it as an administrator.
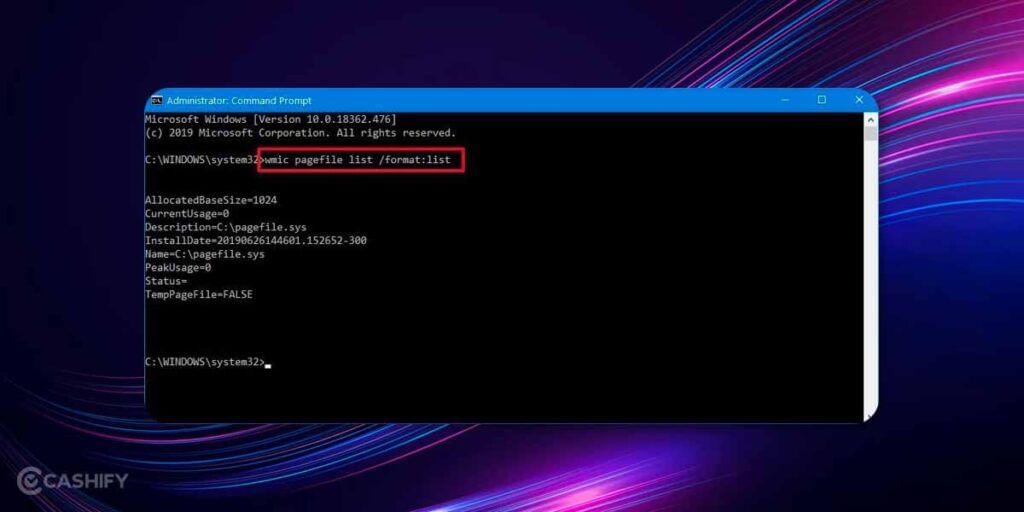
2. Next, you need to enter the following command: wmic pagefile list /format:list and hit enter.
3. Next, you need to enter the following command to switch from manage to custom virtual memory:
wmic computersystem where name=”%computername%” set AutomaticManagedPagefile=false
And hit Enter.
4. The next command involves adding the initial and maximum paging file size and here’s the command:
wmic pagefileset where name=”C:\\pagefile.sys” set InitialSize=YOUR-INIT-SIZE,MaximumSize=YOUR-MAX-SIZE
and hit enter. For instance, I tried setting it up with specific memory values such as
wmic pagefileset where name=”C:\\pagefile.sys” set InitialSize=9216,MaximumSize=12288.
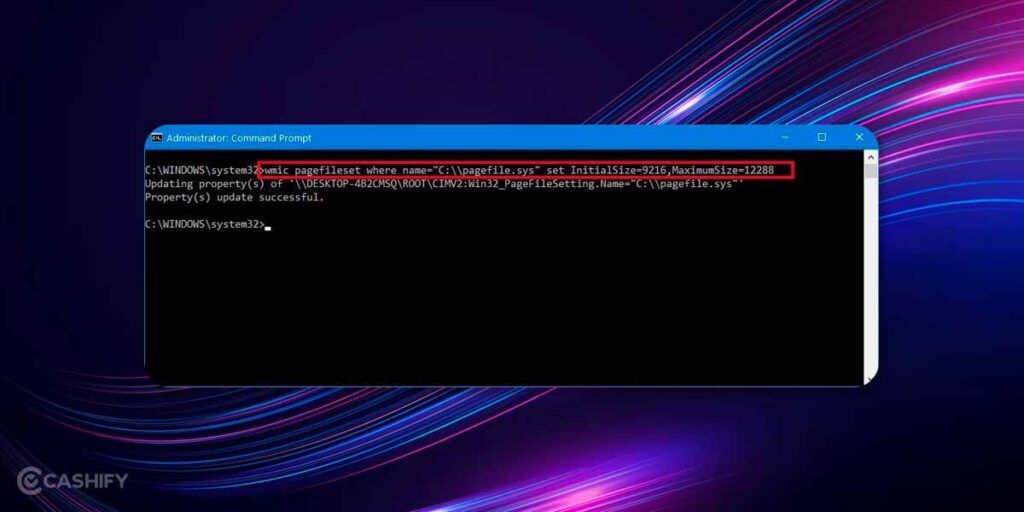
5. Once the command rolls out and it is successful, enter the command “shutdown -r -t 00” and your PC will restart with the new virtual memory values in place.
Also Read: How To Use Remote Mouse App With Windows/Mac Computer
3. Free up RAM Storage
Your PC already has RAM storage that is used as a temporary front before the system writes down data on the HDD/SSD permanently. In case you run out of RAM, your PC uses virtual memory which has a considerably smaller file size by default. Let’s see a few ways you can free up RAM thereby bypassing the need to increase virtual memory on the PC in the first place.
3.1. How to Close Programs Taking Up Too Much Memory
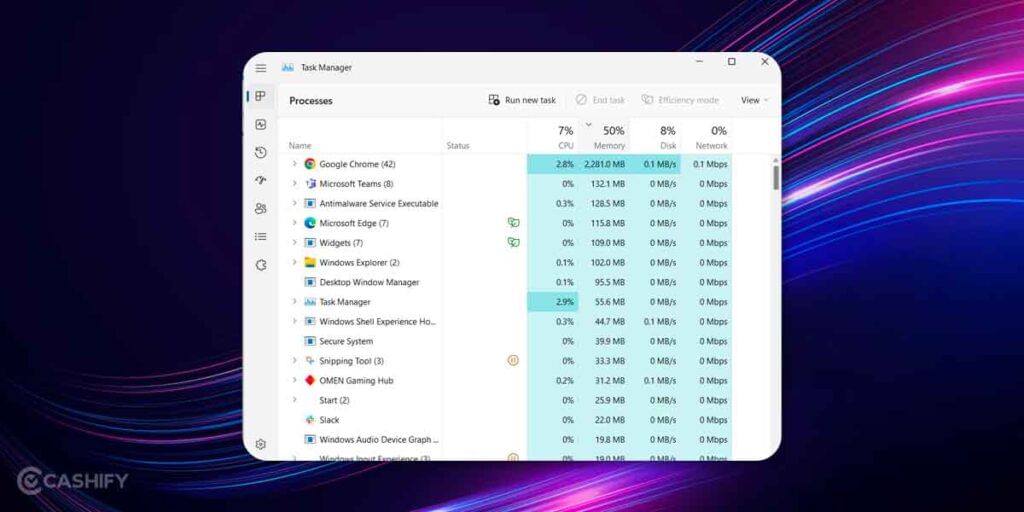
- Press Ctrl+Alt+Del on your keyboard and select ‘Task Manager’.
- Proceed to the ‘Processes’ tab and hit the ‘Memory’ tab to sort it all in descending order of usage.
- Close programs by right-clicking on them and tapping on ‘End Task’.
- Repeat it across all those programs consuming the most memory and you should’ve free RAM storage at your disposal.
3.2. Delete Unnecessary Files
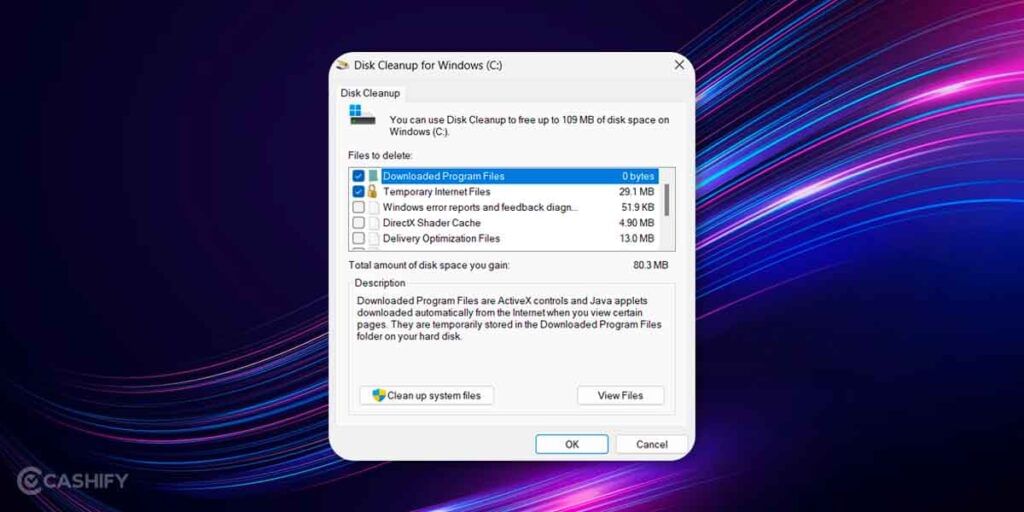
- Go to the Windows Search bar or hit the Windows button and type ‘Disk Cleanup’, click on the result to launch it.
- Select the drive you want to perform the function on i.e. “C:” in this case and hit ‘OK’.
- You need to select relevant boxes against file types such as ‘Downloaded Program Files’, and ‘Temporary Internet Files’ among others.
- Hit the ‘Clean up system files’ button and you are good to go.
Also Read: How To Give Windows 10 A Makeover To Look Like Windows 11


