Microsoft Word is a tool that makes writing documents like articles, business letters, project files, and much more incredibly simple and straightforward. By offering many options like variable page sizes, fonts, colours, symbols, designs, bullets, tables, charts, page borders/numbers, and many more, MS Word makes our document more visually appealing than a piece of paper.
Additionally, it offers many capabilities including text editing, formatting, graphic design, font color and style selection, image and video insertion, document printing, etc. This MS Word program saves our articles and letters into documents and keeps them on the computer. It is possible to share or access the document whenever necessary.
Also Read: Best AI Image Generators To Turn Your Words Into Art!
What do MS Word symbols mean?
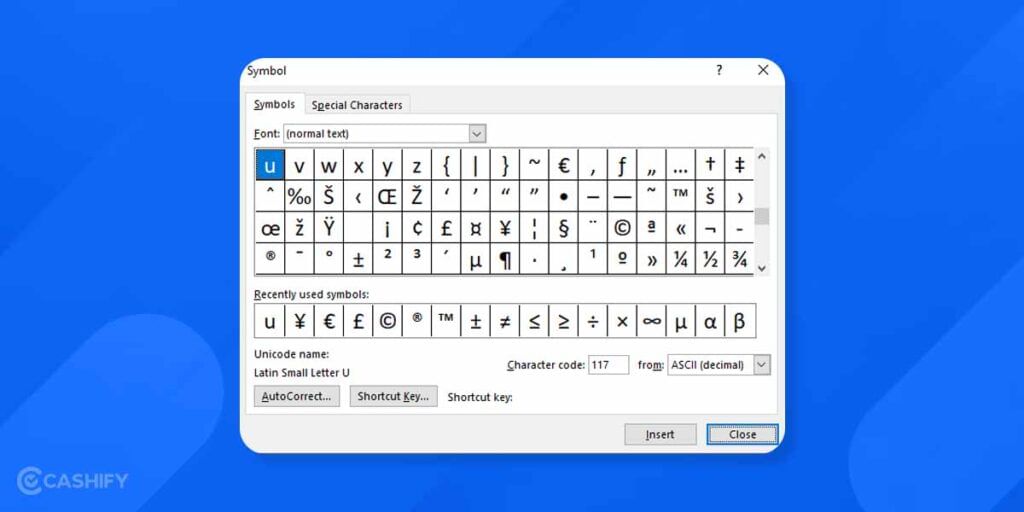
A unique feature in Microsoft Word called symbols allows users to integrate a wide variety of symbols into their documents. There are numerous symbols, special characters, fractions, languages, etc. in MS Word. With the aid of the Symbol dialog box found in MS Word, we can enter symbols and unusual characters.
How to Insert Symbols in MS Word
Step 1: Place your cursor at the point in your Word document where you want to insert the symbol.

Step 2: On the Navigation bar, click on the Insert. This page offers a number of options for integrating symbols and other content kinds in your document.

Step 3: At the top-right corner of the MS Word Navigation bar, you will find a section titled “Symbols” under the “Insert” tab. In this area, select the “Symbol” button to get a drop-down menu with various symbol types.
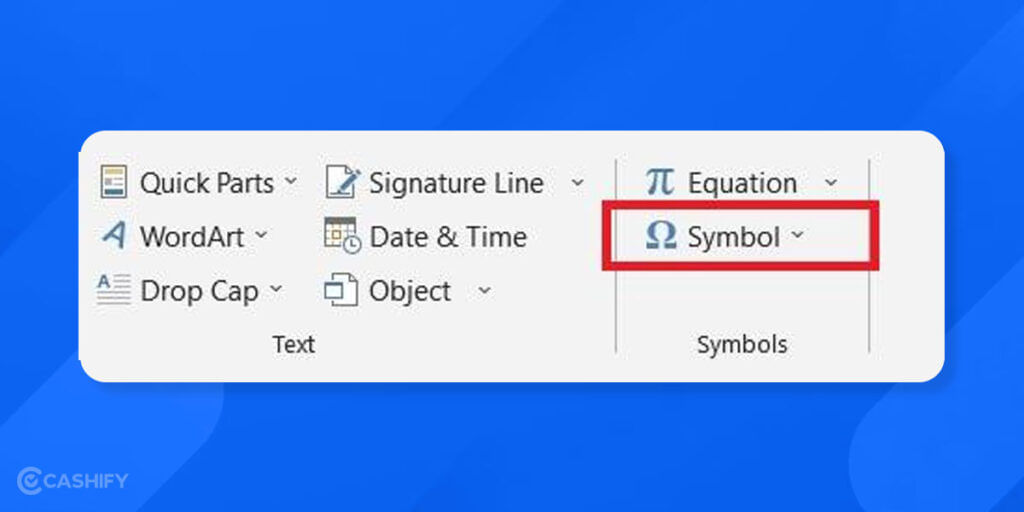
Step 4: Now, select the Symbol of your need to add it to the document.
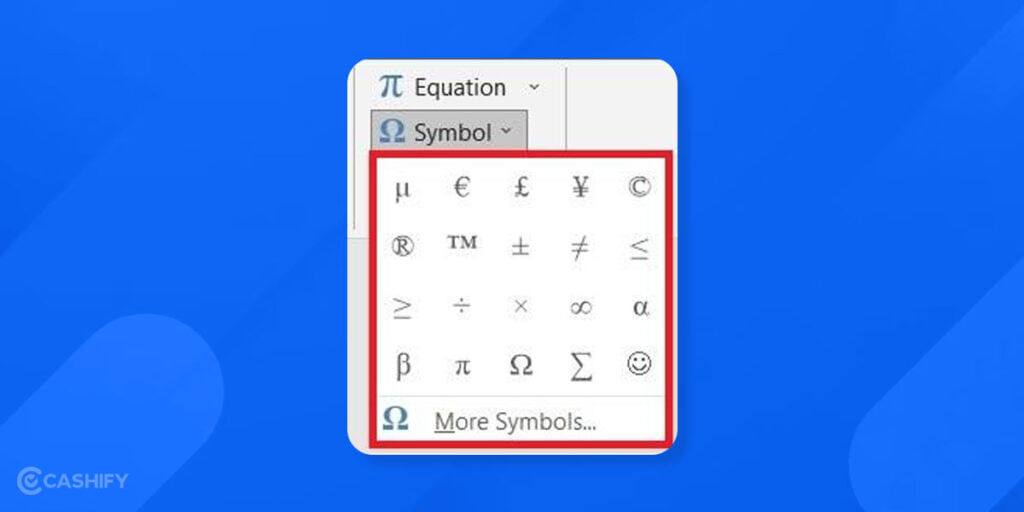
Step 5: You can access other symbols by clicking on More Symbols as shown in the figure below.
Step 6: A Symbol Dialog as shown in the figure below will appear.
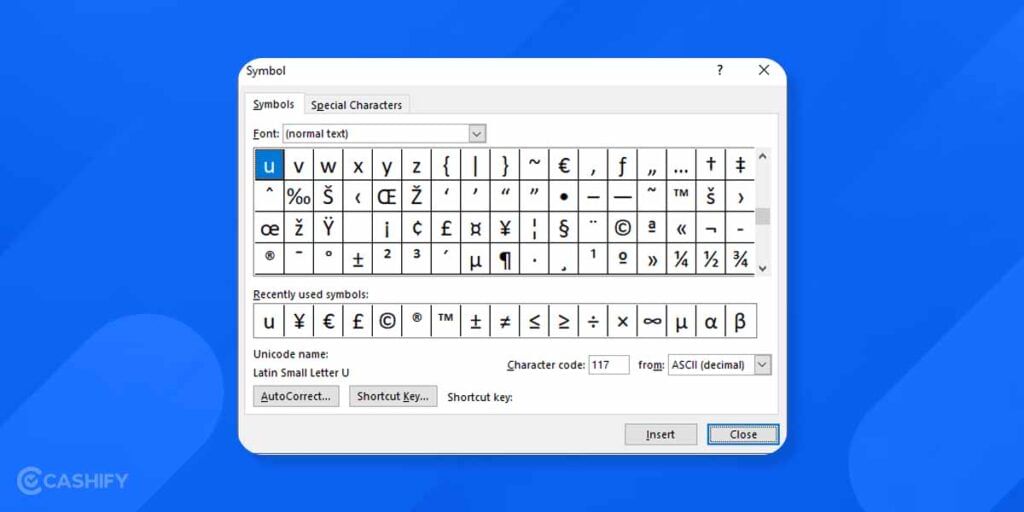
Step 7: Now click on the Symbol option.
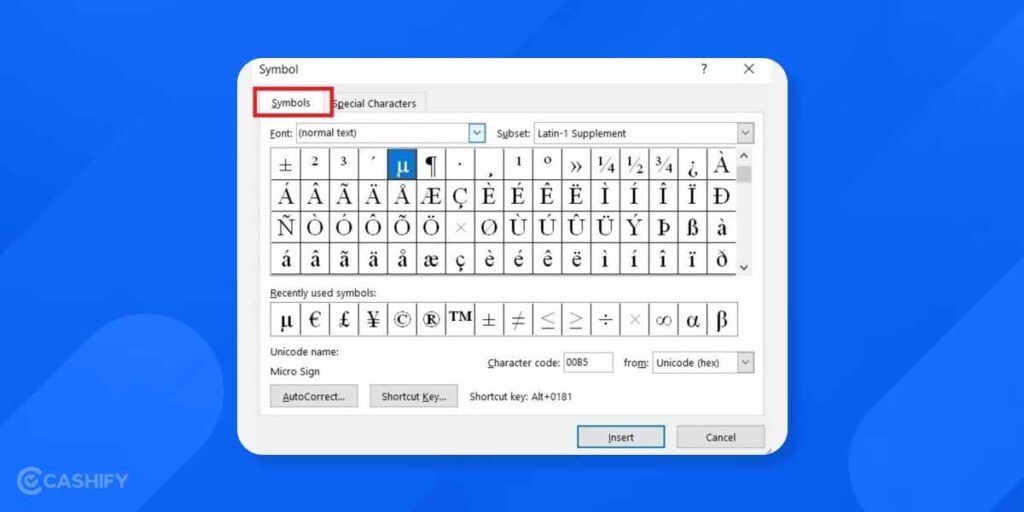
Step 8: Then, to alter the font style of the symbols, click on the drop-down arrow of the font box.
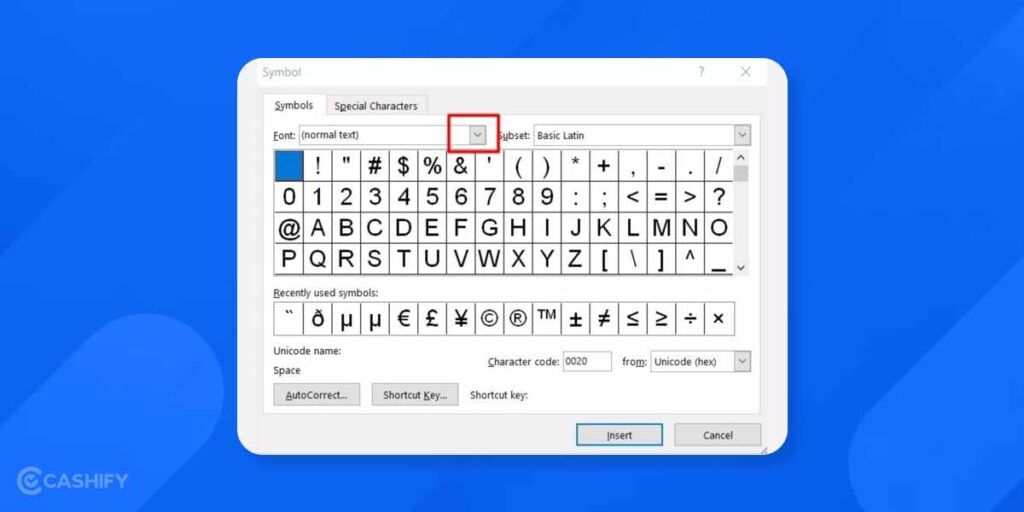
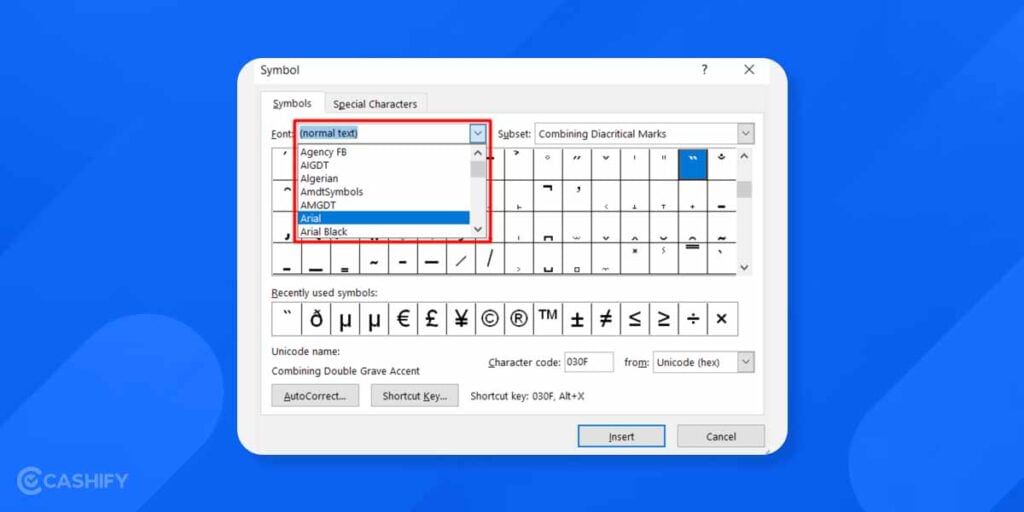
Step 9: Select the Font Style of your choice.
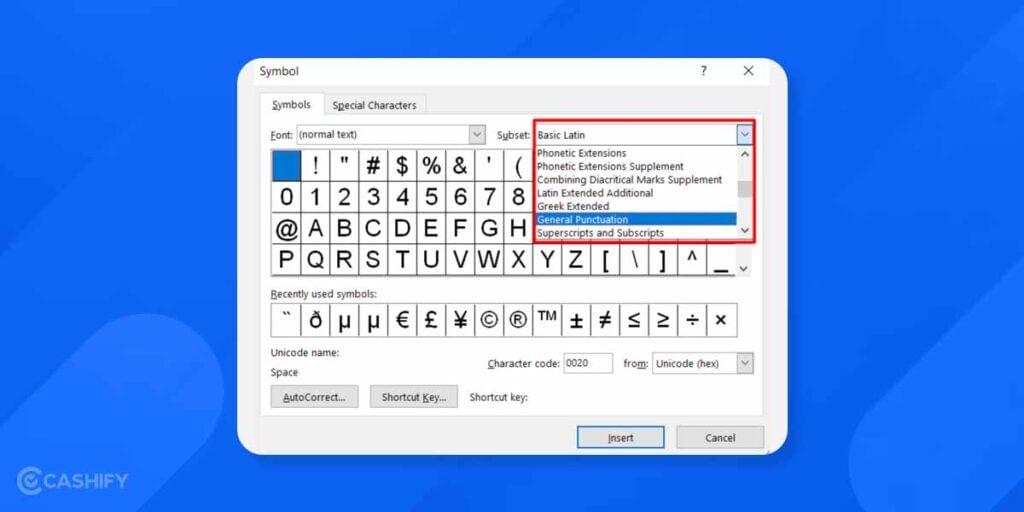
Step 10: Then, to choose the various symbol categories, click on the drop-down arrow of the subset box.
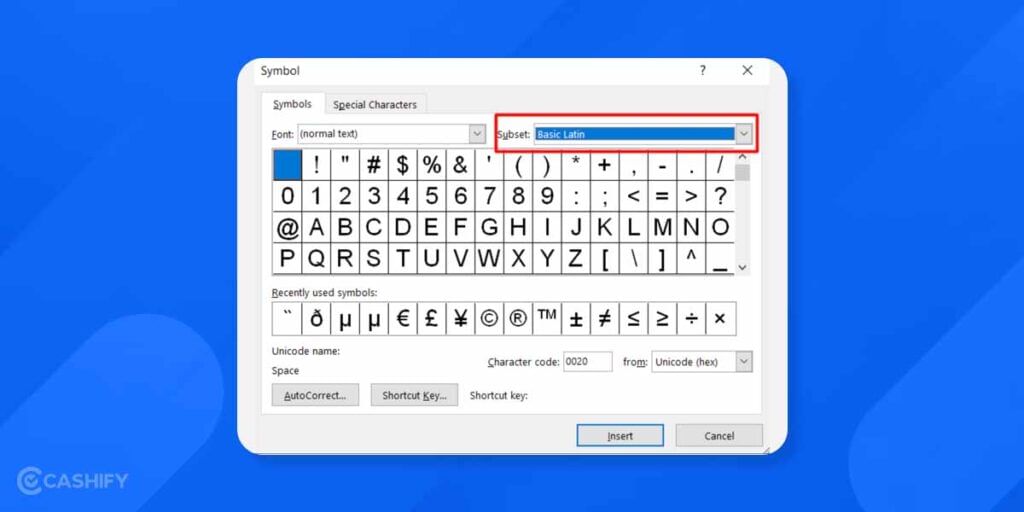
Step 11: From the menu, pick the Symbol Category. From the drop-down menu, select the right category for the symbol you wish to insert.
For instance, choose “General Punctuation” from the list to insert a Punctuation symbol. You can add many more symbols such as Mathematical expressions, Phonetic Extensions, Greek extended, etc.
Also Read: How To Delete A Page In Microsoft Word
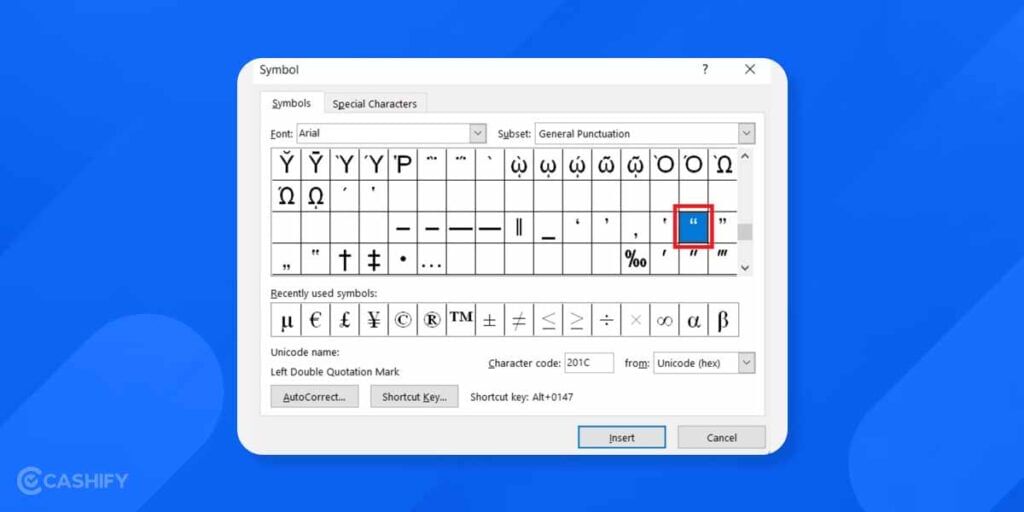
Step 12: Select the Symbol of your choice as per shown below.
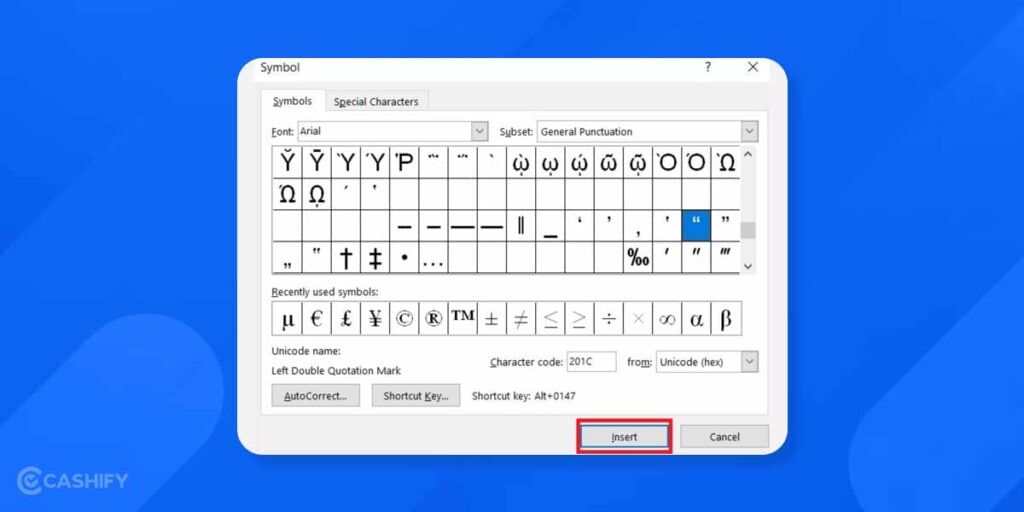
Step 13: After choosing the necessary symbol, Click on the Insert at Symbol menu’s lower right corner to add the symbol to your document.
Steps to Insert Special Characters in MS Word
If you want to add any Special Characters to your Word file, Go through the first 6 steps and then follow the below-listed steps.
Step 1: Choose Special Characters from the Symbol dialog box.
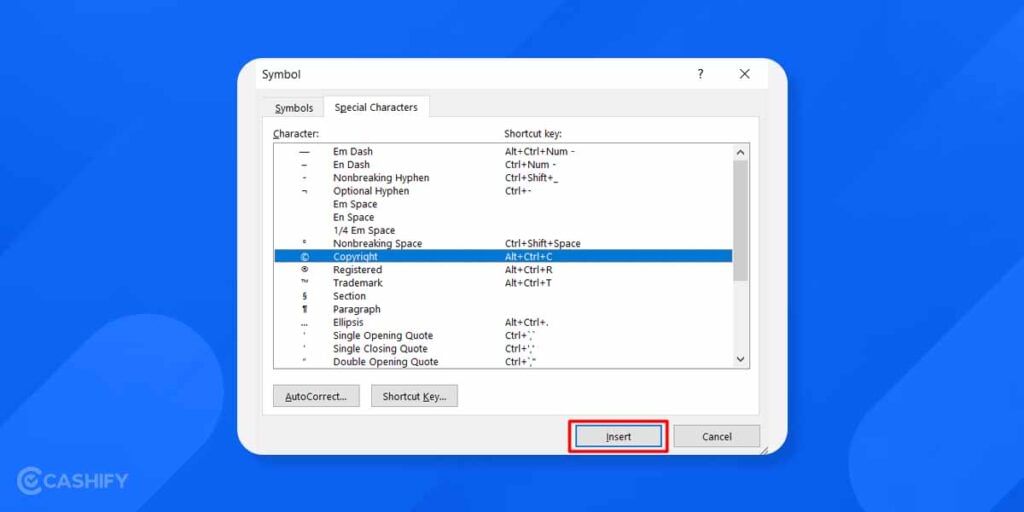
Step 2: Select the Special Character you want to add to the document.
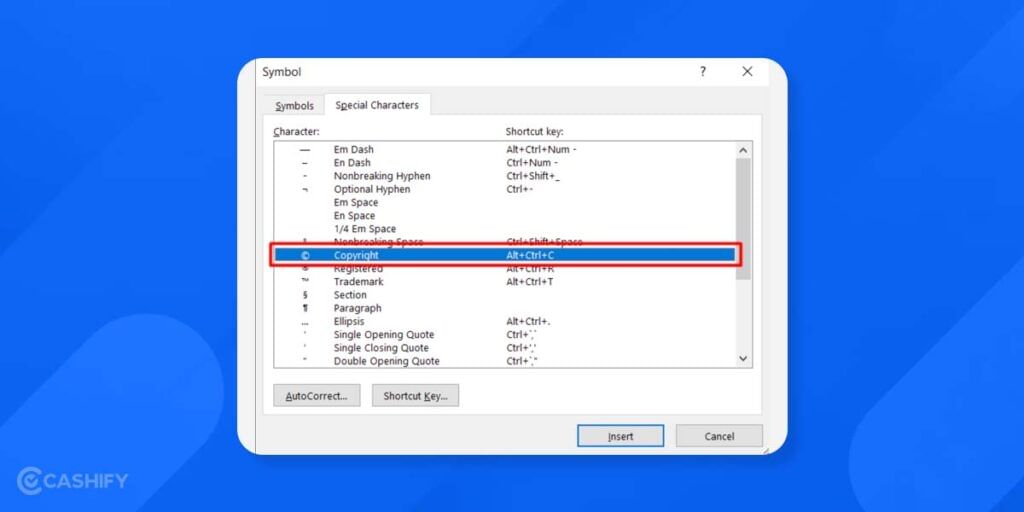
Step 3: Click on the Insert to add the character to your document.
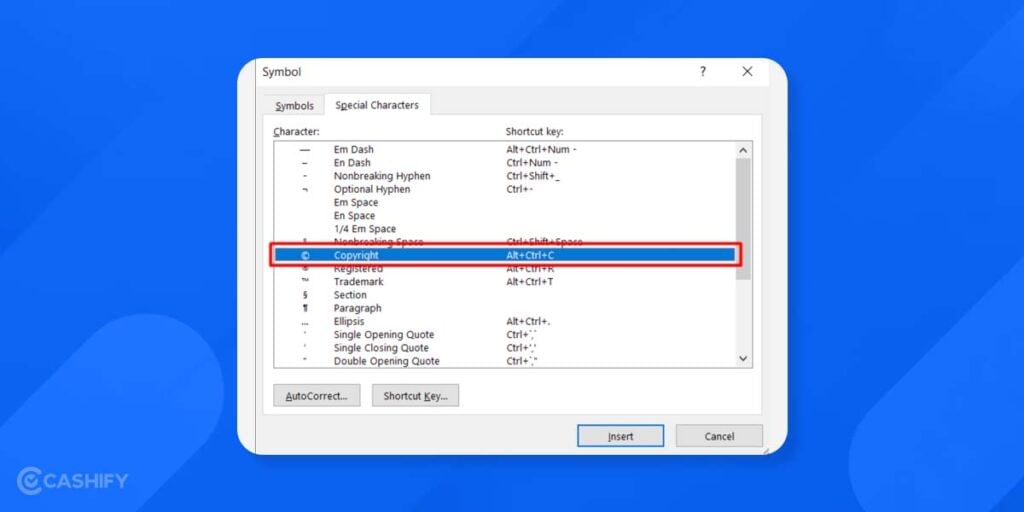
Finally, the Special Character of your choice is added to your document.
Also Read: How To Make PPT using a Smartphone?
Now to Add a symbol Using a Shortcut
It’s not necessary to constantly search through the Insert Symbols dialog box to add symbols like delta (∂), beta (ß), or infinity (∞). Create a shortcut key instead to enable you to insert the symbol without ever taking your hands off the keyboard.
You can attach a certain shortcut key using your keyboard to a particular symbol and add it to your document if you plan to use it more frequently and don’t want to go through each and every step described above. You won’t have to go through the Symbol menu each time you wish to insert the symbol, saving you time.
You never have to use the mouse to insert a symbol because any symbol can have a shortcut key assigned to it. A shortcut key is a letter pushed while simultaneously holding Alt, Ctrl, and/or Shift.
Follow the below-listed steps to assign a shortcut key for a specific symbol.
Step 1: Select the symbol from the Symbol menu which you want to add more often, to assign it a shortcut key.
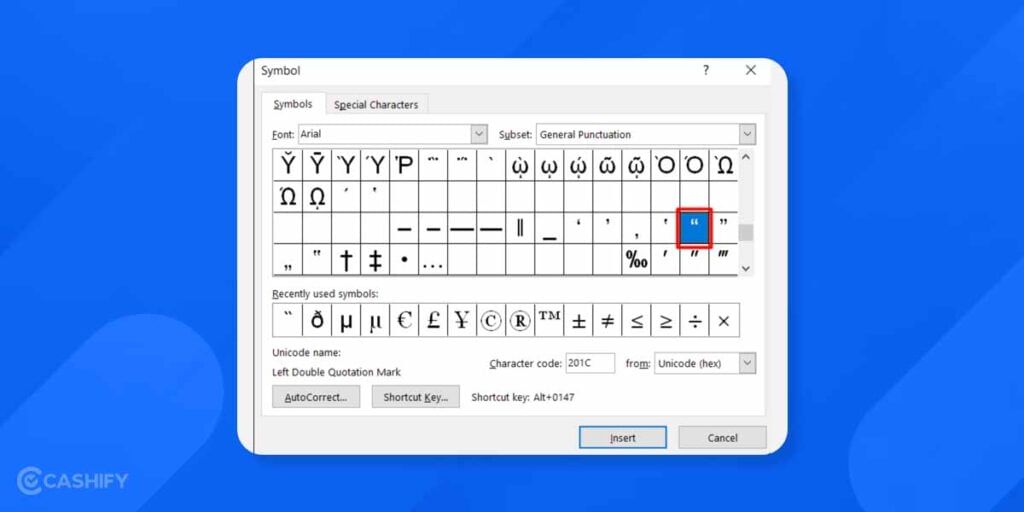
Step 2: Select the Shortcut Key button in the lower-left corner of the Symbol menu. The “Customize Keyboard” dialog box will then be displayed.
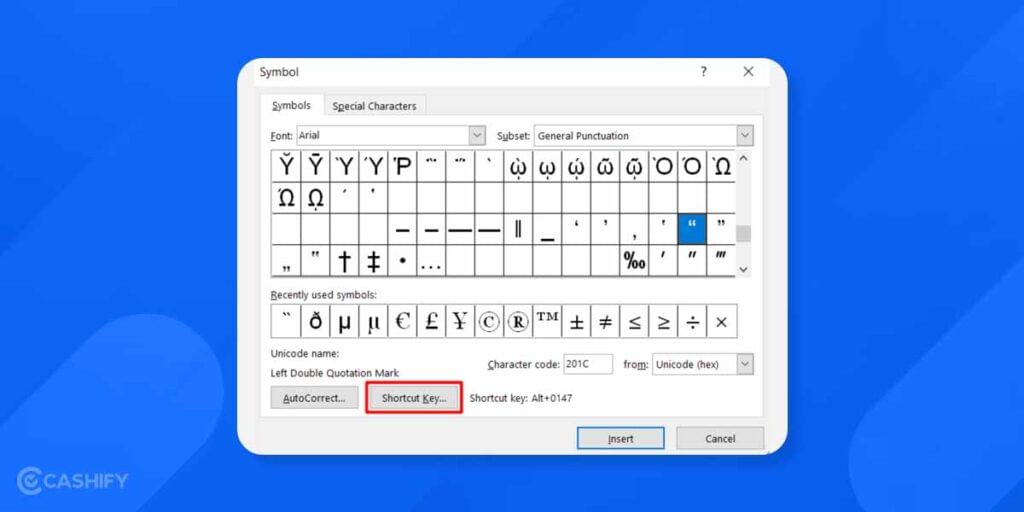
Step 3: Press the keyboard shortcut you want to use to insert the symbol in the “Press new shortcut key” area. For instance, Use Alt + Ctrl + P.
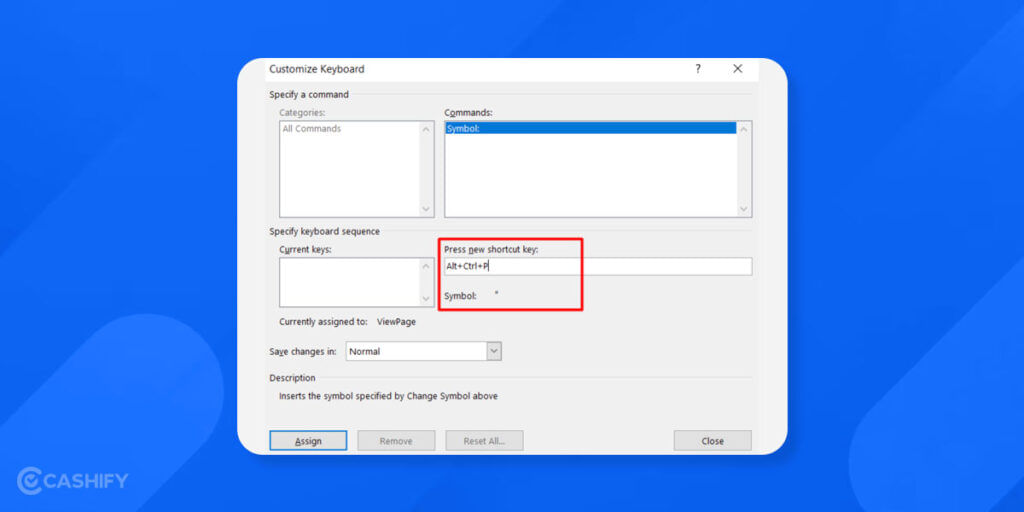
Step 4: Once you’ve decided on a keyboard shortcut, you can assign it to a symbol by clicking the Assign button.
Step 5: Next, close the “Customize Keyboard” dialog box by clicking the Close button.
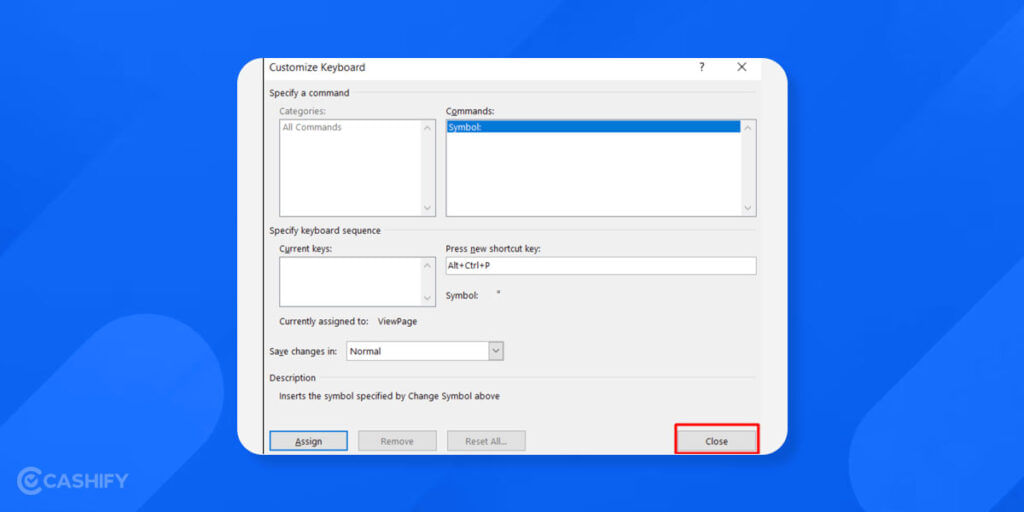
Now that you’ve assigned a shortcut key to the specific symbol, all you have to do is press the keyboard shortcut you gave it the next time you need to insert the symbol, and the symbol will appear in your document.
Also Read: How To Change WiFi Password? A Step-By-Step Guide


