There are times when you need to send photos from your iPhone to Windows. Be it for clearing out space or just making a backup, knowing how to transfer the photos quickly always helps. Since iOS devices don’t work like Android devices, hence you might encounter issues when transferring photos. Luckily, we have got some easy solutions for you. The best part- we are going to talk about methods that don’t require you to install iTunes. So, let’s begin.
Also Read: How To Transfer Data From iPhone To iPhone Via 4 Easy Options
Best Ways to Send Photos from iPhone to Windows
Here are the three easiest ways that you can adopt for transferring photos from iPhone to Windows.
Method 1: Send Photos from iPhone to Windows directly
You need to connect your iPhone to the computer to perform this method.
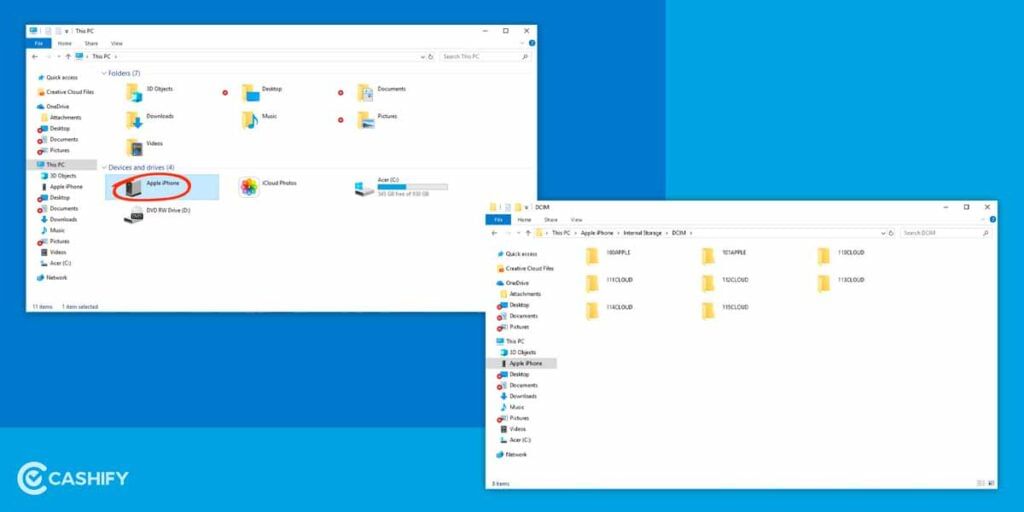
Step 1: Connect your iPhone to the computer with the help of a lightning cable. If you are connecting the phone for the first time, you need to tap on the “Trust” button. Next, click on “Allow” to let the device access photos and videos.
Step 2: Once your phone is connected. Head to “File Explorer>This PC”. There, under the External Devices section, you will see your iPhone’s icon.
Step 3: Click on it to open. Then browse to the Internal Storage section and then to the DCIM folder.
Step 4: Now right-click on the photos or videos or copy the entire folder and paste it into the desired location on your Windows.
This is undoubtedly the easiest way to send photos from iPhone to Windows.
Method 2: Share Photos from iPhone to Windows with iCloud
Before moving ahead with this method, you need to sync iPhone photos with iCloud.
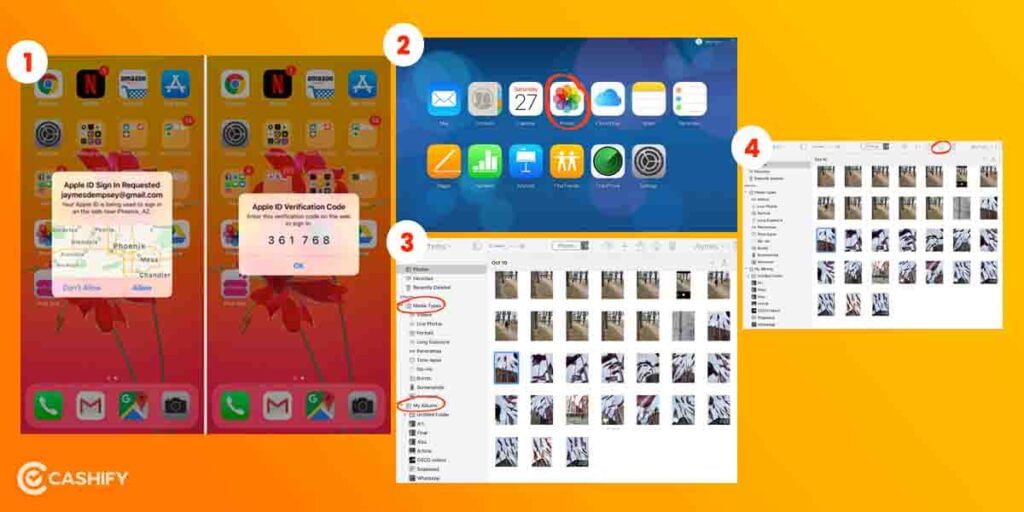
1: Go to Settings>Photos. Then, toggle on the “iCloud Photo Library” option. This will upload all your iPhone photos to iCloud.
2: Now, open iCloud.com on your PC or download iCloud for Windows.
3: Sign in to your iCloud account using the same ID and password that you are using on your iPhone.
4: On the home screen, click on “Options” next to the “Photos” tab. Now, choose the desired action from the available options.
Step 5: You can also select a specific location for the photos to be shared. Finally, click on Done.
Also Read: Here’re The Two Simple Ways To Delete Photos From iCloud
Method 3: Share Photos from iPhone to Windows with Photos App
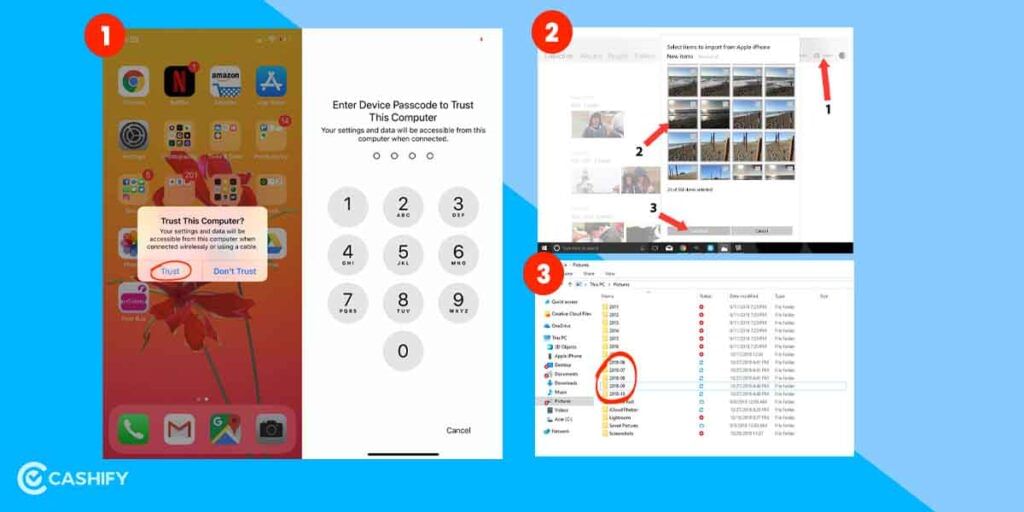
Windows have a by default Photos App. You can use it to transfer photos from your iPhone as well. Here’s how to do it:
Step 1: Connect your iPhone to the Windows with a cable. Give permission to the system to access the photos or videos.
Step 2: Once the phone is connected, open the Photos App on your computer. You can find it in the Start menu or simply search for it.
Step 3: Open the app. Now, click on the Import icon in the top-right corner. There, you will get two options- Import from a folder and Import from a connected device.
Step 4: Choose the second one. Now, photos on your iPhone will be displayed on the computer in a thumbnail view.
Step 5: Select the photos you want to transfer and finally click on “Continue”. Wait for a few minutes till the photos are transferred to the computer.
Also Read: 4 Cloud Storage Services That Works Best For Apple Users
Thinking of upgrading to a new smartphone? Recycle old phone with Cashify. Or you can also Sell phone online and get the best buyback value with us.


