If you are wondering how to delete Facebook Account, you are not alone. Whether you are shifting to a new platform, leaving social media, or are just privacy conscious, you might want to delete your account permanently.
But before you do, you should know that once you do it, there is no going back. So it’s a move that should be well thought of, especially when you are using it to stay connected with your friends and family.
Also Read: How To Create A New Facebook Account: Step By Step Guide
What To Do Before You Delete Your Account Permanently?
Before you delete your account permanently, there are a few things that you should always keep in mind.
- Back up your data like photos, videos, messages, etc.
- Inform your friends and family about your decision. If you don’t have their contact details, take them to stay connected.
Let’s now understand how to delete Facebook account.
Also Read: 5 Best Call Recording Apps That You Cannot Miss
How To Delete Facebook Account?
Now that you have made a backup of your data, you can proceed with the deletetion. Follow these steps:
Step 1: Open Settings and Privacy. There you will find the Accounts Centre, click on it.
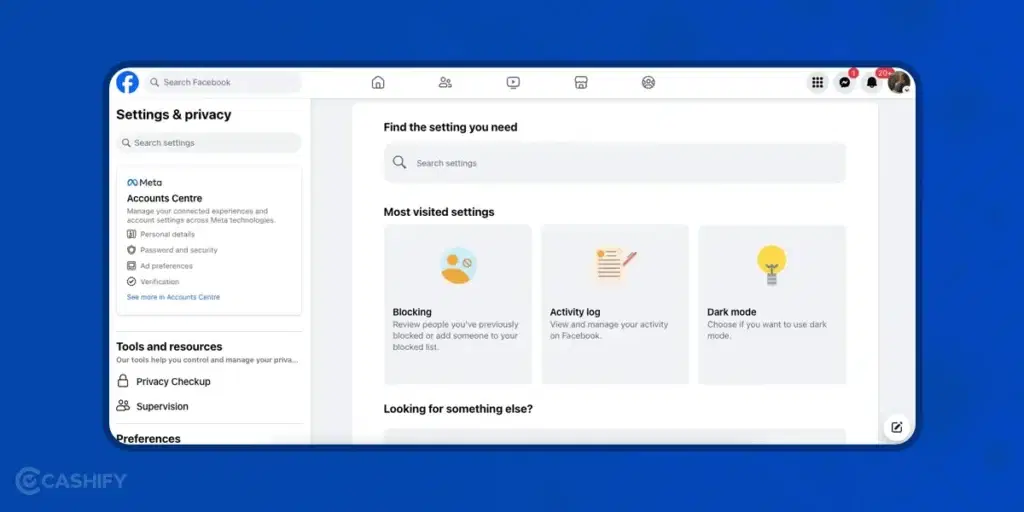
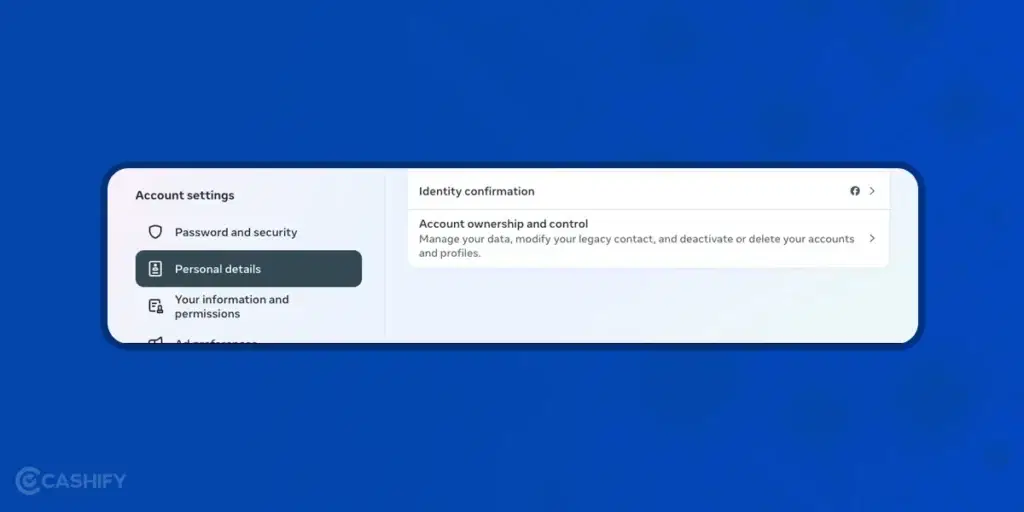
Step 2: Select Personal detail and go to Account ownership and control. This will take you to the Deletion menu.
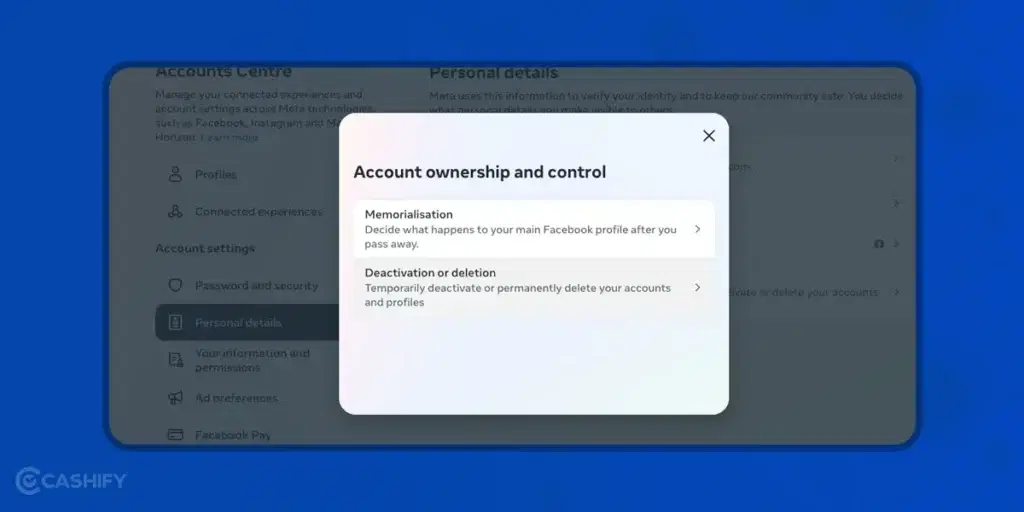
Step 3: Click on Deactivation or Deletion and select your Facebook account.
Step 4: Click Permanently delete account and continue the process. You will have to mention the reason why you are deleting your Facebook Account.
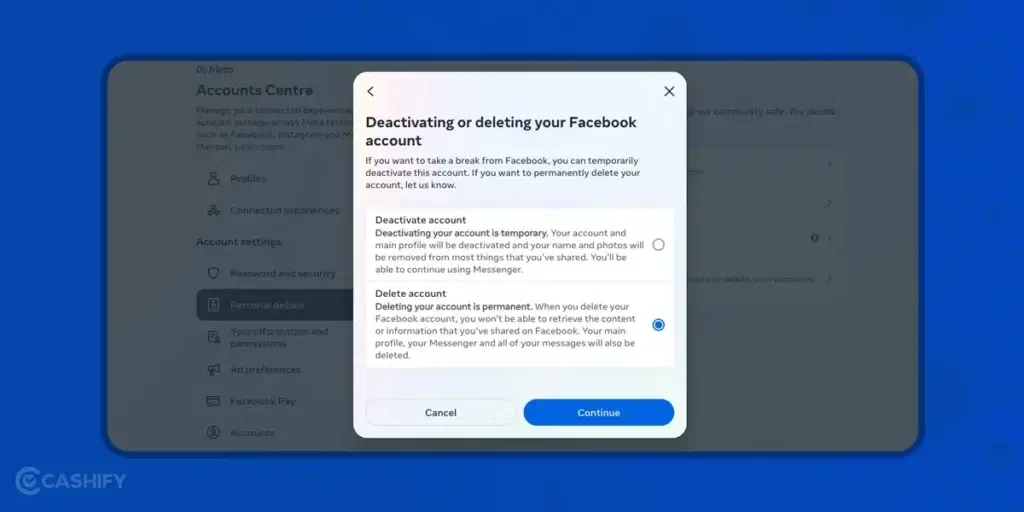
Step 5: Continue the process till you reach the end. You will be asked to enter your password. This is the final step, there is no going back after this.
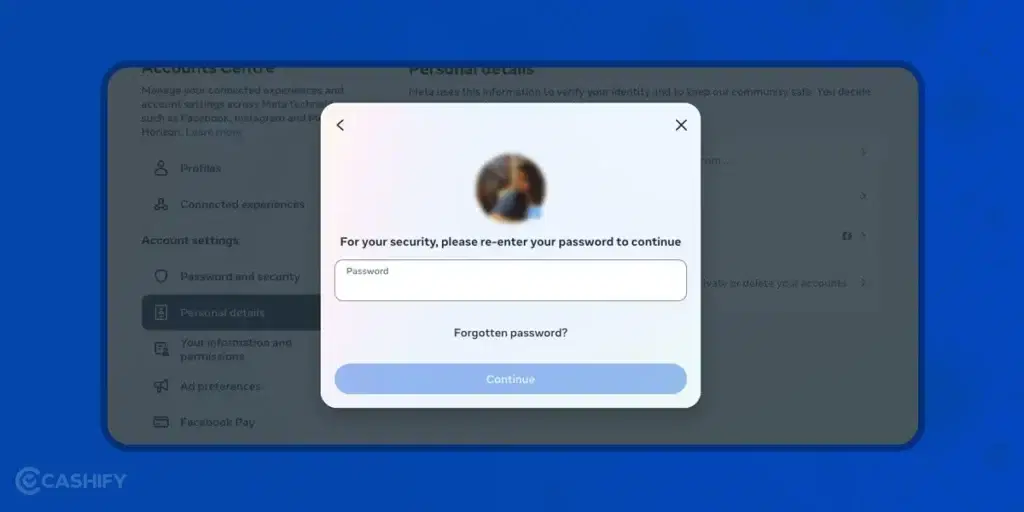
Please be extra sure before you delete your account permanently as this may lead to complete loss of your account.
Also Read: PUBG New State Vs Free Fire MAX: Battle Royale Showdown! Who Wins?
Delete Facebook Account Vs. Deactivate Facebook Account
Let’s have a quick look at the difference between Deactivating Facebook account and Deleting Facebook Account permanently:
| Aspect | Deactivating Account | Deleting Account |
|---|---|---|
| Reactivation | Can reactivate anytime. | Cannot regain access once deleted. |
| Visibility | Profile hidden, not searchable. | It is permanently deleted |
| Information Visibility | Some info may remain visible (e.g., messages sent). | Messages may still be accessible to friends; some data remains in the database, but you cannot access it. |
| Access to Meta Quest | Facebook account needed for Meta Quest access. | Deleting Facebook account deletes Meta Quest info; no app returns, lost credits. |
| Deletion Process | Not Applicable | Deletion delayed can be cancelled if logged in during the process. |
How To Reactivate Facebook Account?
Follow these steps to reactivate your Facebook account:
- Visit the Facebook website or open the Facebook app on your device.
- Log in to your account by entering your email/ mobile number and password.
- You may need to complete a security check by entering a code sent to your email or phone number.
- Once you’ve successfully logged in, your Facebook account will be reactivated.
One should remember that this is only applicable if you have previously deactivated your account. This process will not help if the account is deleted permanently.
How To Make A Backup Of Facebook Data?
Here are the steps to download your information on Facebook:
Step 1: Open Settings. This can be done by clicking on your profile photo on the top right corner of the screen.
Step 2: Once you enter the Settings menu, scroll down and click on Download your information.
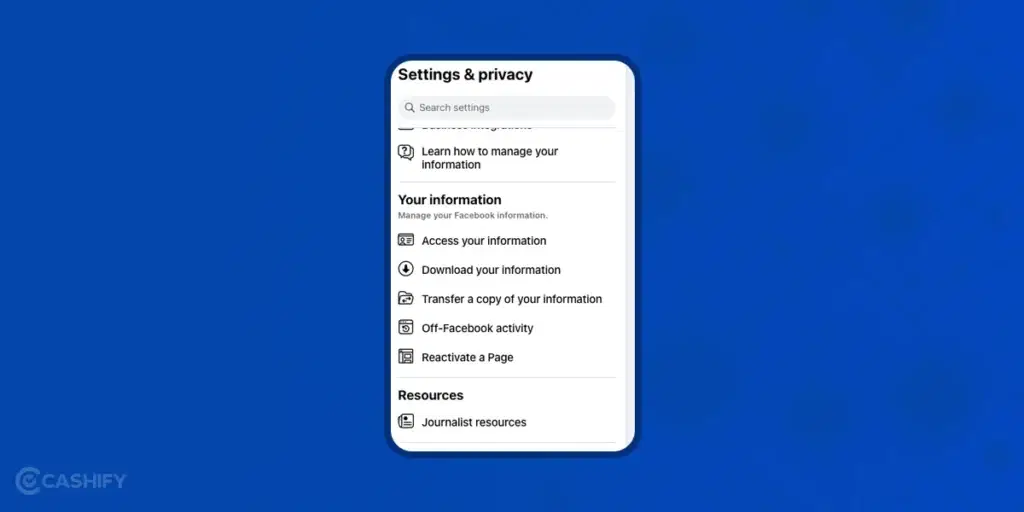
Step 3: Click on Continue and you will be able to choose the kind of information you want to download. Click on Download or Transfer information.
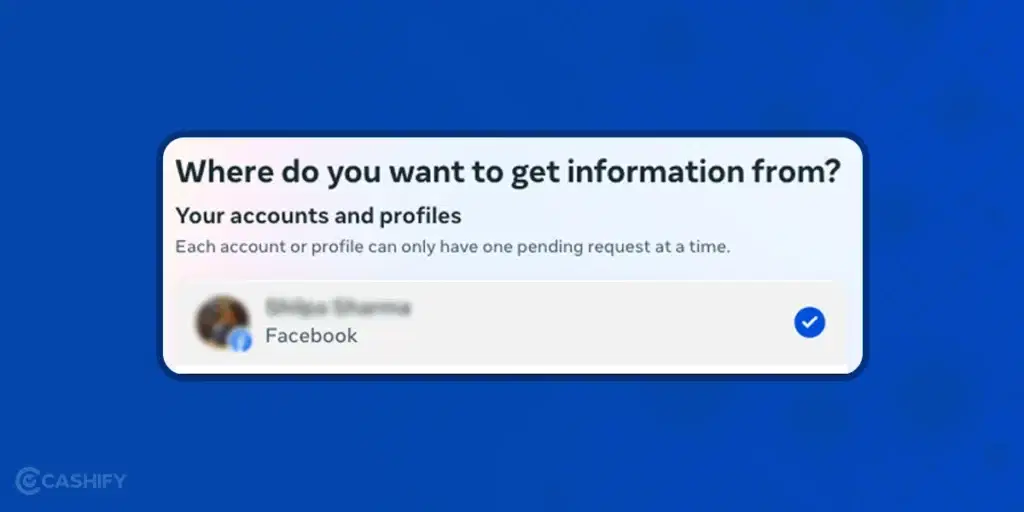
Step 4: Select the account or Facebook Page whose information you want to download. In this case, I have selected my profile.
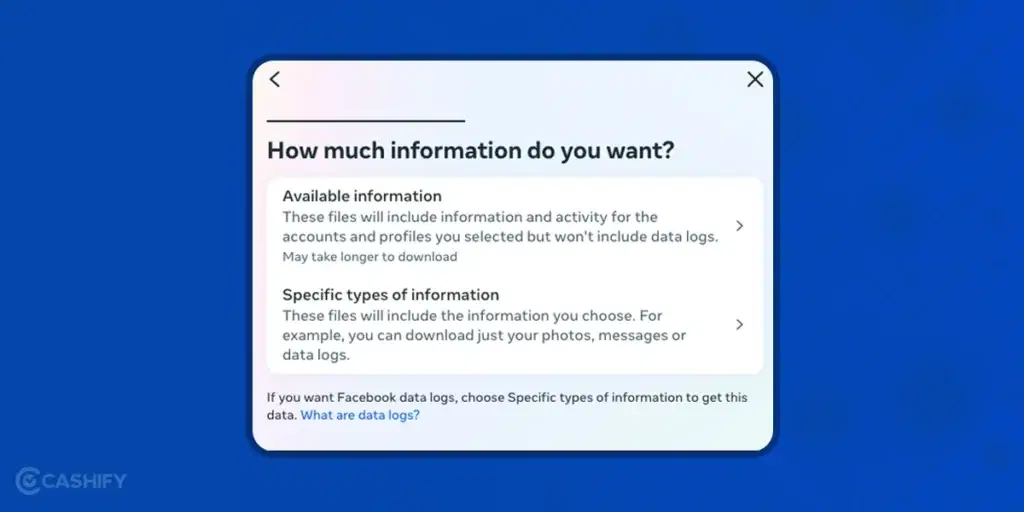
Step 5: You will be asked to select how much information you want to download. You can either select all the information or specific files.
Step 6: Now, you must choose whether you want the backup file downloaded to your device or transferred to another destination. You can choose to transfer to Google Drive or Dropbox.
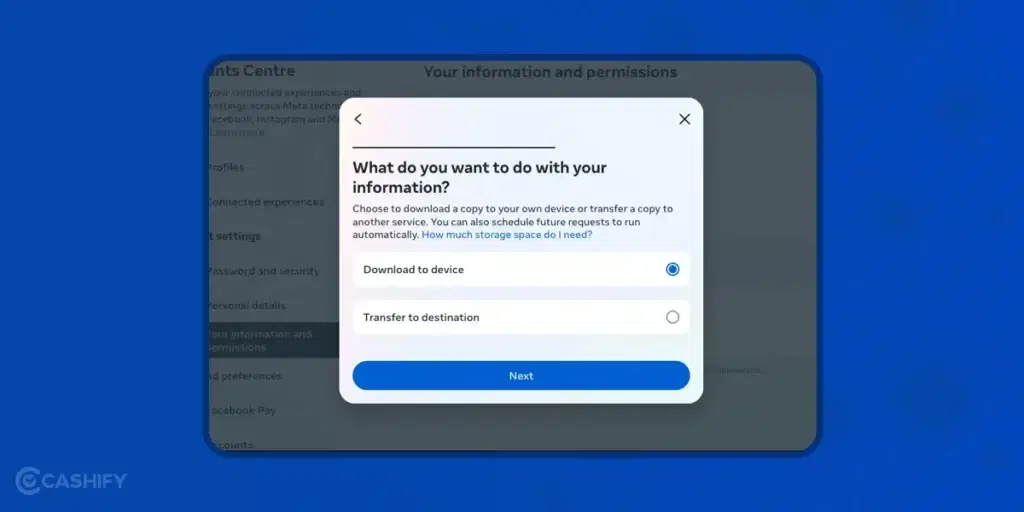
Step 7: After this, you will just have to select the date range and your files will be ready to be downloaded.
Also Read: How To Recover Hacked Facebook Account?
Frequently Asked Questions
Q: How do I delete Facebook from my phone?
To delete Facebook from your phone:
- Open your device’s settings.
- Look for “Application Manager” or “Apps.”
- Find Facebook in the list of installed apps.
- Tap on Facebook.
- Select “Uninstall.”
Q: Where is the delete option in Facebook?
To delete your Facebook account from the Android app:
- Open the Facebook app.
- Tap the menu (three lines) and choose Settings & Privacy.
- Go to Settings > Access and control.
- Tap Deactivation and deletion, then choose Delete account.
Q: How can I delete all my Facebook at once?
To delete all your Facebook posts at once:
- Click on Activity Log.
- Go to Your Activity Across Facebook > Posts > Your Posts in the left-hand menu.
- Select All.
- Click on Recycle Bin.
Q: How do I delete my FB account permanently?
To permanently delete your Facebook account:
- Log into Facebook on a computer.
- Click your profile picture in the top right.
- Choose Settings & Privacy, then click Settings.
- Click Your Facebook Information.
- Select Deactivation and Deletion.
- Choose Delete Account and click Continue to account deletion.
Wrapping Up
The process is simple to delete your Facebook account permanently. But there are a few things that you should know. Once you have deleted the account, make sure to remove your Facebook link from other platforms. You can still be connected to your Facebook friends and family with other Meta Platforms like Instagram and WhatsApp.
Also Read: Here’s How To Get Zee5 Membership For Free!
Remember to share this article with anyone who wants to know how to delete Facebook account permanently. Let me know if you face any issue in these steps in the comment section below. I would love to hear from you.
Sell old mobile phone and use the cash to upgrade to a better one. You can get your old phone picked up right from your doorstep and get best price for it. Avail some of the best deals Cashify has. Sell old phone and buy refurbished mobile phone right away!


