An income Tax Return (ITR) is a form that taxpayers must fill out to declare their taxes, tax deductions, investments, expenses, and income among others. The new income tax portal lets you e-file income tax return (ITR) making the process a lot faster and efficient than ever before.
Also Read: Here’s How You Can Check Your EPFO Balance Online Within Minutes
Filing an ITR is important as it helps compute tax and avail deductions in terms of returns making it a cost-saving mechanism for taxpayers in the country. Here’s how to file an income tax return via the new e-filing website.
Step-by-Step On How To File Income Tax Return Online
Step 1: Login
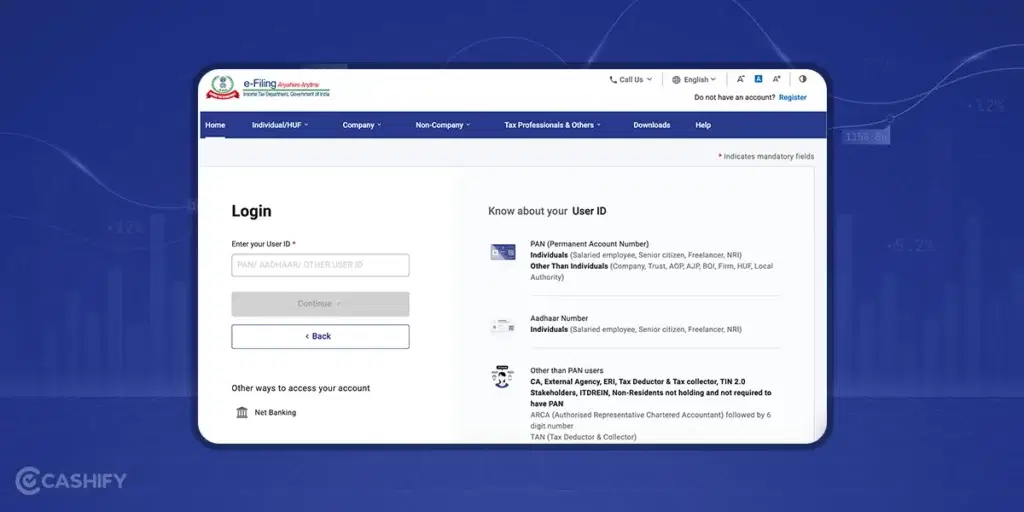
- Firstly, go to Income Tax’s e-filing website and hit ‘Login’.
- You need to enter your PAN card number in the User ID section.
- Tap on ‘Continue’.
- You should see a security message so tick it.
- Enter the password.
- Then, ‘Continue’.
Step 2: Go to ‘File Income Tax Return’ option
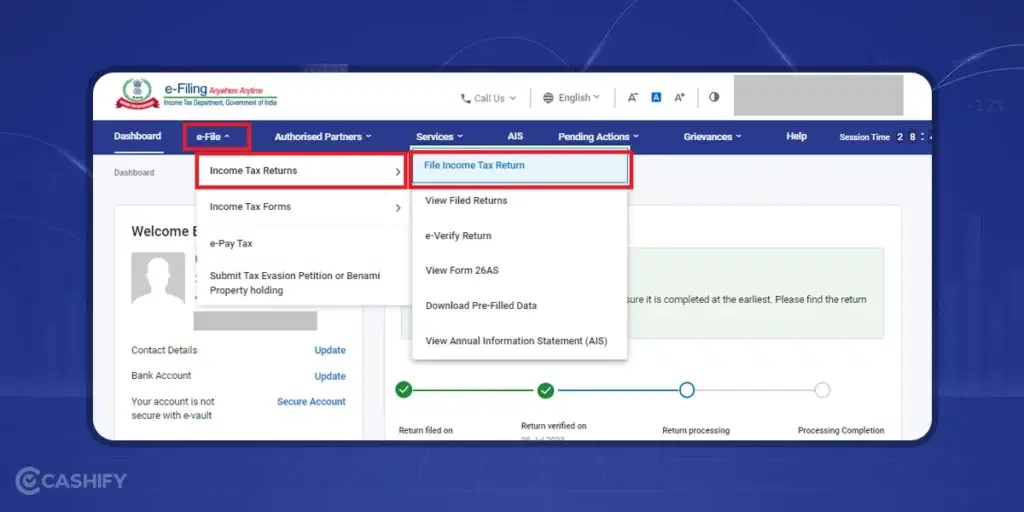
On the top-most navigation bar (in dark blue colour), tap on the ‘e-File’ tab and proceed to ‘Income Tax Returns’ >> ‘File Income Tax Return’ from the dropdown menu.
Step 3: Select Assessment Year
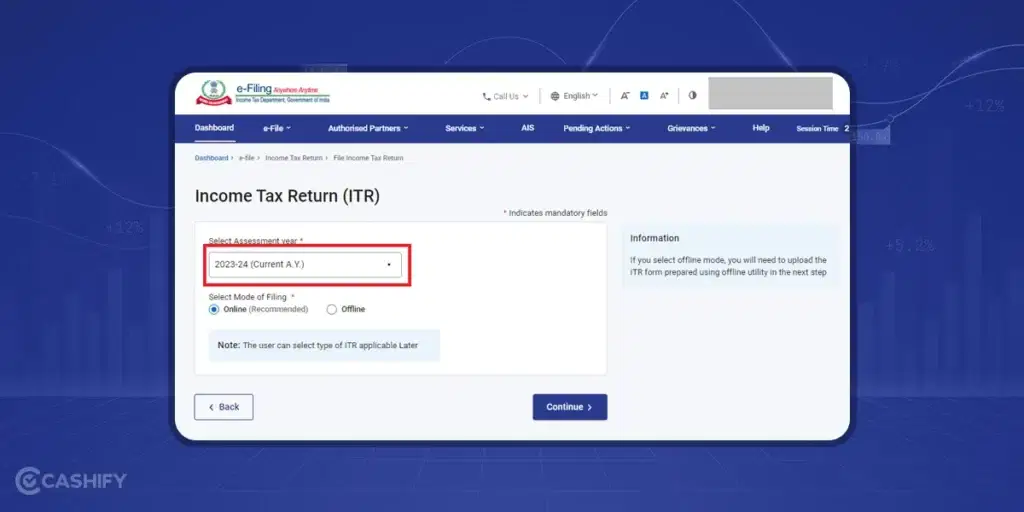
- When prompted to enter the assessment year, you need to select ‘AY 2024-25’ if you are filing an income tax return for FY 2023-24. Similarly, select ‘AY 2023-24’ if you are filing ITR for ‘FY 2022-23’.
- You need to select the mode of filing as ‘Online’.
Also read: How To Transfer Amazon Pay Balance To Bank Account: Step-By-Step Guide!
Step 4: Select Status
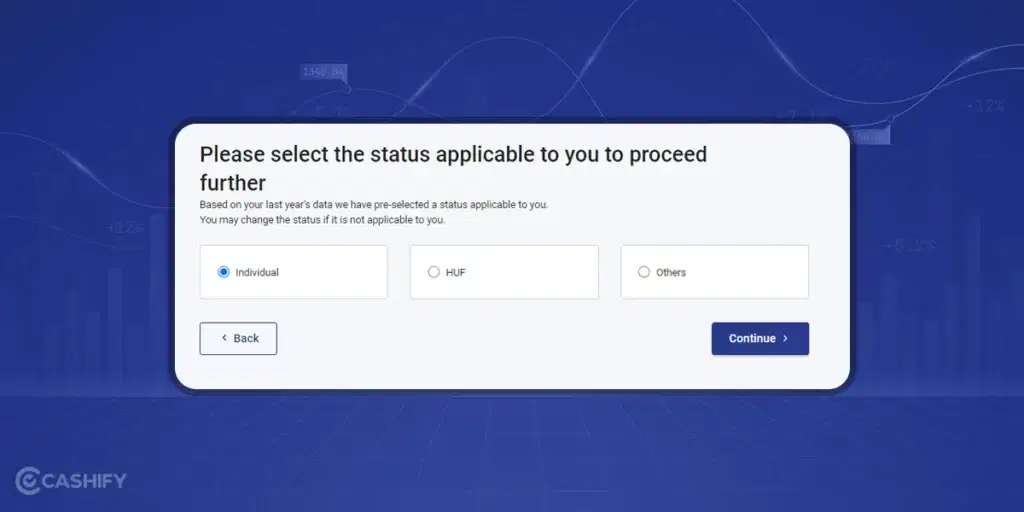
You need to select the appropriate filing status – Individual, HUF, or Others. If you are filing an ITR for yourself, you can go for ‘Individual’. Similarly, you can seek help from your CA or someone who knows the applicable status to select the appropriate option.
Step 5: Select ITR Type
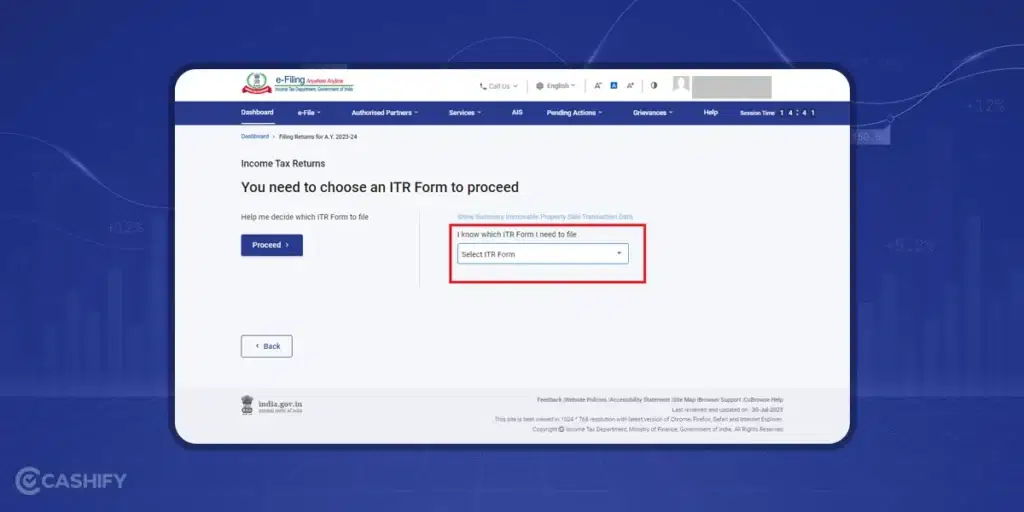
You need to select the appropriate ITR Type. A taxpayer in India is required to choose the correct type as there are 7 ITR forms to be filled with the ITR 1 to 4 reserved for Individuals and HUFs. Again, I would recommend checking out the FAQs or seeking assistance from your CA.
Step 6: Reason for Filing ITR
You need to select the appropriate reason for filing your returns. You can choose from ‘taxable income is more’, ‘expenditure and specific criteria as mentioned’, and ‘others’ as the available options.
Hit ‘Continue’ after choosing the appropriate choice.
Also read: How To Pay Credit Card Bill?: Easy Guide
Step 7: Bank Account Details
This is the step where you will be asked to add bank accounts. If there are already account(s) added, you can tap on ‘Selected for refund’ if you want an existing account to be added. Tap on the ‘+ Add Another’ button to add more accounts should you wish.
Step 8: Validate
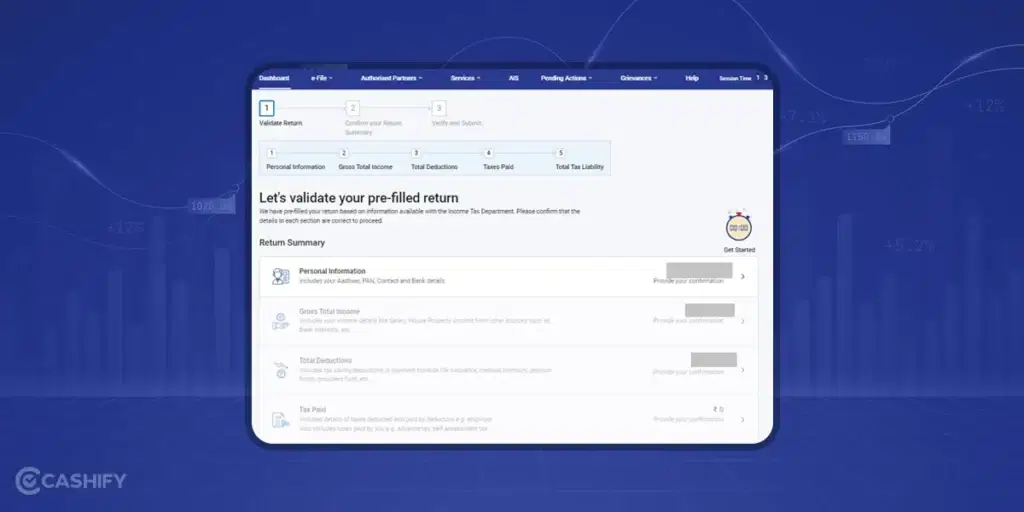
The next step is to validate the pre-filled information. As the name suggests, most of your details including PAN, contact information, date of birth, Aadhaar, bank details, etc, will be auto-filled. However, it is crucial to validate this information and mention any missing information as well.
You will have to disclose any exemptions, income, and deduction details as required. Once you review all the information, you might be asked to make payment of balance taxes, if applicable.
Step 9: E-Verify your ITR
The final step is to verify your income tax returns within a 30-day time limit. In case you forget to fail to verify your returns, it would be assumed as though you haven’t filled up the form at all.
You have multiple options to e-verify returns including electronic verification code (EVC), Aadhaar OTP, net banking, or via a physical copy to ITR.
Also read: How To Pay House Tax Online?
Common Mistakes To Avoid On How to File Income Tax Return
Choosing the wrong ITR Form
As aforementioned, there are seven ITR forms available on the website and each has a prescribed user group. For instance, users with income up to INR 50 lacs including house and other sources come in ITR-1.
ITR-3 and ITR-4 are reserved for businessmen, professionals, and presumptive taxpayers such as freelancers, respectively. Choosing the wrong form will make the ITR e-filing invalid requiring you to refile it.
Choosing the Wrong Assessment Year
The next logical mistake is choosing the wrong assessment year. If you make a mistake here, you might have to pay tax twice and that will also attract penalties.
No Declaration of All Bank Accounts
Taxpayers in India are required to declare all their bank accounts in the country except those that are dormant. Moving further, you will be asked to select a bank account where you want the ITR refund.
No reporting of Capital gains on the Sale of Assets
Filing of ITR requires detailed information on the sale of capital assets, purchases, and expenses to calculate capital gains. As a taxpayer, you must provide details on capital gains, any exemption facts, and investments to compute tax on sales of assets.
Also Read: When to Upgrade Your iPhone & Tips on Choosing a Refurbished iPhone
If you’ve just bought a new phone and don’t know what to do with your old phone, then here’s your answer. Sell old mobile to Cashify and get the best price for it. If you are planning to buy a new phone, check out Cashify’s refurbished mobile phones. You can get your favourite phone at almost half price with a six-month warranty, 15 days refund and free delivery.


