Apple released the first iOS 15 developer beta last month in June. Since then many users have shifted to the beta release for trying the new iOS. And now with the public beta of iOS 15 being released a few weeks ago, a lot of new users are installing the iOS 15 on their devices.
The iOS 15 beta is still in the early stage of development and is might have a lot of bugs that might affect your day-to-day functionality. Although these bugs sometimes can differ from user to user and Apple keeps releasing the new Beta versions of the software to fix the existing bugs.
Some of the commonly known issues with the new iOS 15 are poor battery performance, minor heating issues, slow/laggy UI performance, and some app compatibility issues. These bugs should be resolved in the coming Beta updates of the iOS 15.
If you’re one of those who over-excitedly installed the iOS 15 beta on their iPhone and now regretting the decision. Here is a complete method to downgrade from iOS 15 Beta to iOS 14.
Also Read: How To Speed Up Old iPhone?
Things to Remember before downgrading to iOS 14
There are few things you need to take care of before downgrading to iOS 14. One of which is having a backup of all your data before installing the iOS 15 beta. You cannot restore the backup of iOS 15 beta to iOS 14.
However, there are some tweaks to it, but Apple doesn’t recommend using that. If there is still some data (like photos, documents, files, etc) left to backup then you can do it through cloud services like iCloud Drive, Google Drive, etc.
Also Read: Best Free Google Photos Alternatives To Save Your Images On Cloud
If you have already installed the WathchOS 8 Beta on your iWatch and paired it with your iPhone. After downgrading to iOS 14 you won’t be able to use your smartwatch as there isn’t any method to downgrade to WatchOS 7.
Also, make sure you have a Mac or PC to install the iOS 14. And in case you aren’t using the latest macOS on the MAC you have to download an IPSW file.
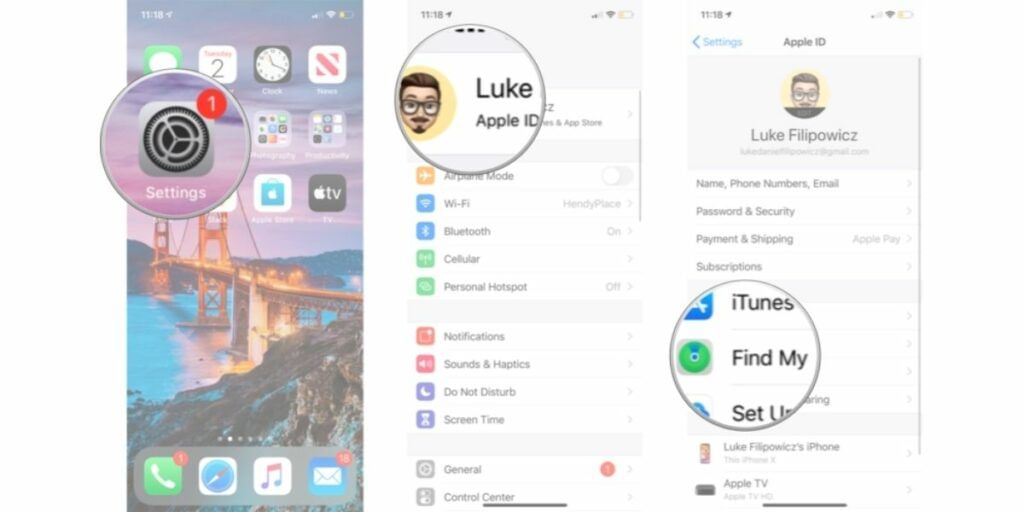
To make this process work you should also turn off Find My iPhone. For doing this, open Settings, and select your Profile at the top. Now tap on Find My > Find My iPhone > Turn Off. It will ask you to enter the passcode to confirm.
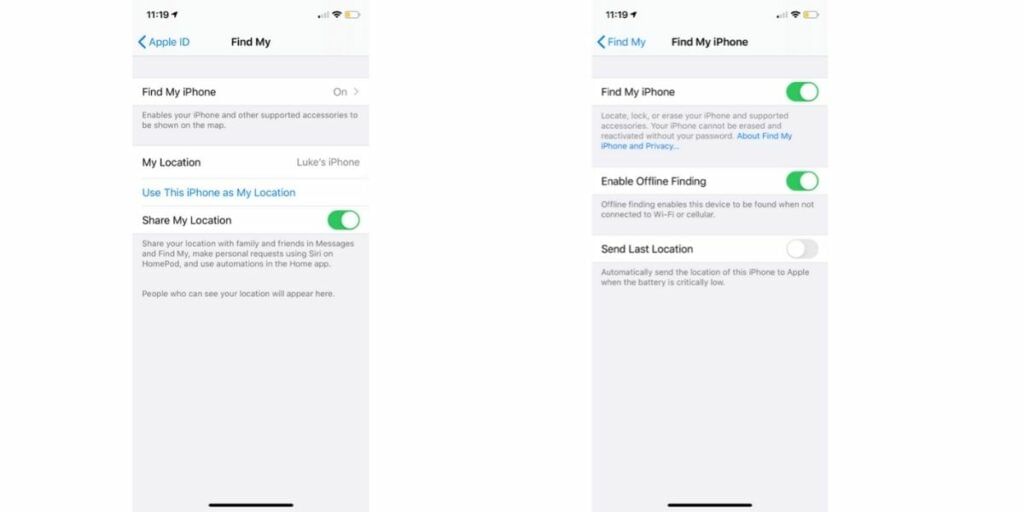
So, it’s time to downgrade to iOS 14 but before that, you have put your iPhone into Recovery mode. For doing that below are all the steps, follow them according to your iPhone. These steps are essential to downgrade from iOS 15 to iOS 14.
Also Read: 20 Best Tips And Tricks For Your iPhone 12 And 12 Pro
Put Your Phone into Recovery Mode
The steps to get into Recovery Mode vary from device to device. Make sure you are using the right one.
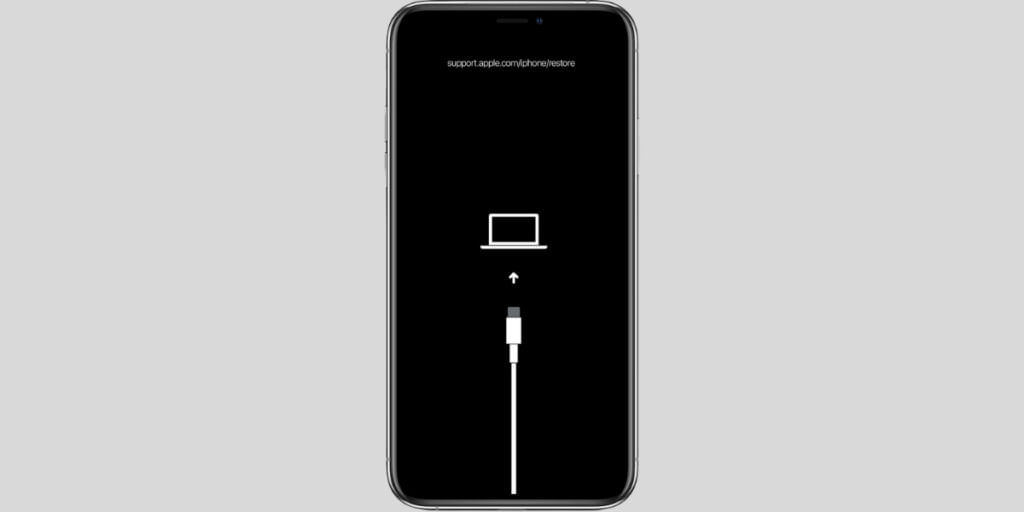
iPhone 8 or later: Press and release the Volume Up button, and do the same with Volume Down. Then, press and hold the Side button until your device goes into recovery mode.
iPhone 7 & 7 Plus: Press and hold the side button and volume button down simultaneously. Keep holding the buttons until you see the recovery-mode screen.
iPhone 6 and earlier: Press and hold the Power button and the Home button together. Continue to hold both buttons until the recovery mode screen shows up.
How to Downgrade from iOS 15 Beta to iOS 14?
- The first step is to connect your iPhone to your computer through a cable. You can also do this before reaching recovery mode.
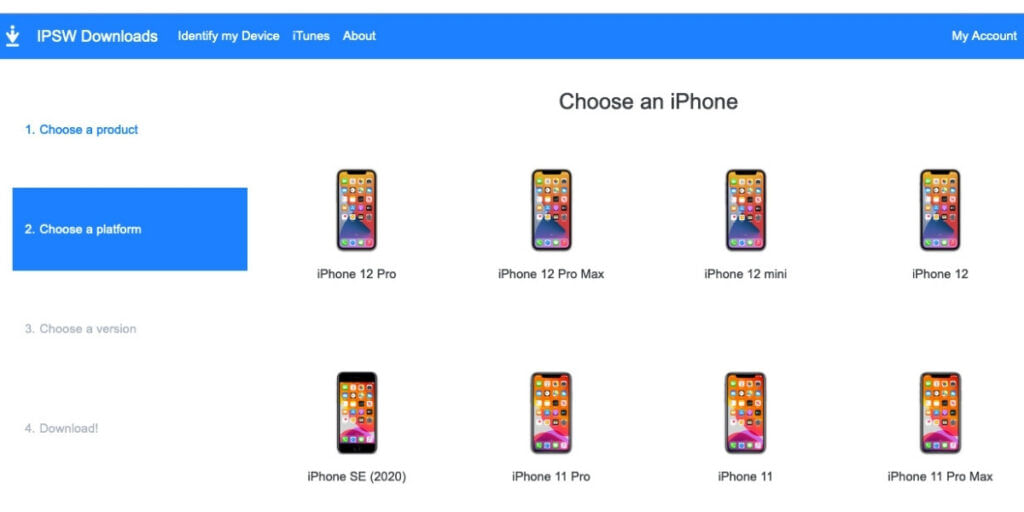
- As we mentioned earlier, if you aren’t using the latest version of macOS, you can download the IPSW file. You can select your iPhone model and it will take you to the download page.
- Now open Finder, if your Mac is running the macOS BigSur, Catalina, or the latest macOS Monetery. If you have any macOS version earlier than these or using a Windows PC you can open iTunes.
- In Finder, you can see your device in the sidebar under Locations. If you are doing it for the first time, it will ask you for some permission. Just tap Trust on the iPhone and enter the passcode. On iTunes, you can find access to the device by clicking on the tiny iPhone icon.
- Once you move forward, they will let you know that a device was detected in the Recovery Mode.
- Now, on your Mac press and hold the option key. And if you are using Windows press and hold the shift key. Then, select Restore iPhone.
- It will open a new window, you have to select the IPSW file that we have downloaded in Step 2 and then click Open.
- A popup will appear to ask for confirmation. Just click on Restore and move forward. (If you are on the latest macOS versions, it will automatically show to download and install the latest iOS 14 version. So you won’t need to download the IPSW file and can skip the above two steps).
- Now it will take some time to complete the process. You can see the progress bar on your Mac. Once everything is done the Apple logo will show up and your iPhone will automatically restart.
After the restore is done, you can either set up your iPhone as a new device or restore a backup that of your previous iOS 14 through iCloud or MAC/PC.
Note: Make sure you follow all the steps carefully and in case you are stuck somewhere you can contact the Apple support center and they can help you to downgrade from iOS 15 to iOS 14.
Also Read: How To Check Whether Your iPhone Battery Needs Replacement
For the latest smartphone news, stay tuned to Cashify. We also allow you to compare mobile phones so you can find out the better phone before buying.


