There was a time when Mac systems used to come with hard disks with tons of storage. And now with HDD being replaced by faster and more reliable SSDs, now Macbooks come with limited storage that is not even upgradable.
With this limited storage, your MacBook can easily run out of space. And 256GB is the average storage size among Macbook users, it’s pretty easy to fill up the storage.
Also Read: Most Useful Mac Keyboard Shortcuts
How To Clean Up Mac and Free Some Storage
The most obvious way is to find-and-delete items and apps that are useless and free up some storage. Here are some tips to clear up some extra storage from your mac. And it is preferred to perform these actions once a month to free up some extra storage.
1. Check Downloads Folder: Navigate to Finder and navigate to the Downloads folder. Look for files that are not required and duplicate files. Select all these files and move these files to the trash bin.
2. Empty Recycle Bin Folder: Open the ‘BIN’ app on your Mac and select “Empty Trash” to clear all the files permanently. This should clean up mac and free a lot of space on your mac as once the files are deleted they are moved to the trash bin so that they can be recovered later. Clearing ‘Bin’ deletes all these files permanently.
But honestly, this is these actions can clear storage to a limit and won’t help much. But here are a few methods using with which you can free up some extra space on your Macbook.
Also Read: Find My iPhone: Here’s How To Use Find My App
Method 1: Clean Up Mac Using Built-in Disk Cleaning Tool
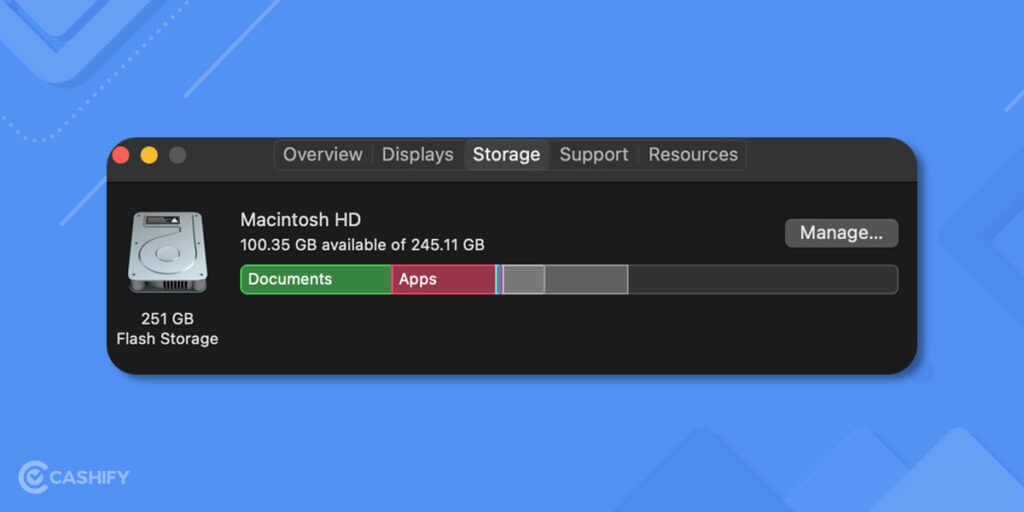
Before beginning the disk cleaning process, it is important to identify which apps or files are consuming storage on your mac system. To identify these files, click on the Apple Logo on the top left, then click on “About This Mac” and on the popup window select the ‘Storage’ tab and click on ‘Manage’.
Once you see the storage management section you can see all the apps, documents, and different types of files that are occupying the internal storage. You can navigate this one by one and remove the unwanted files. For example, in the ‘Documents’ folder, you can see a lot of files under the tab ‘Large Files’. It is a good idea to either move these large files to a portable HDD or remove these if these files are of no use.
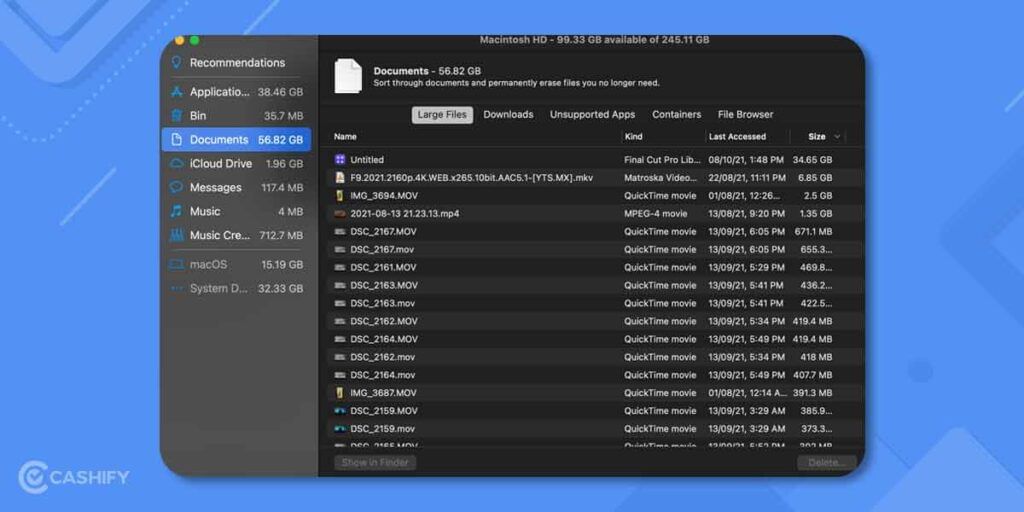
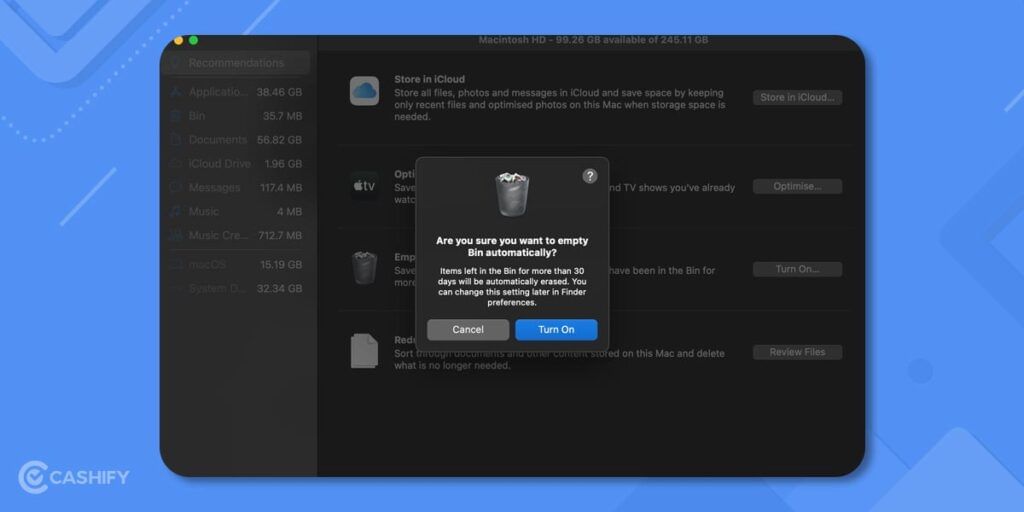
In the same menu, you can also see all apps that are occupying storage on your system. Under ‘Recommendations’, you have an option to ‘Reduce Clutter’. Now select ‘Review Files’ option to view all the files that might be useless and should be cleared.
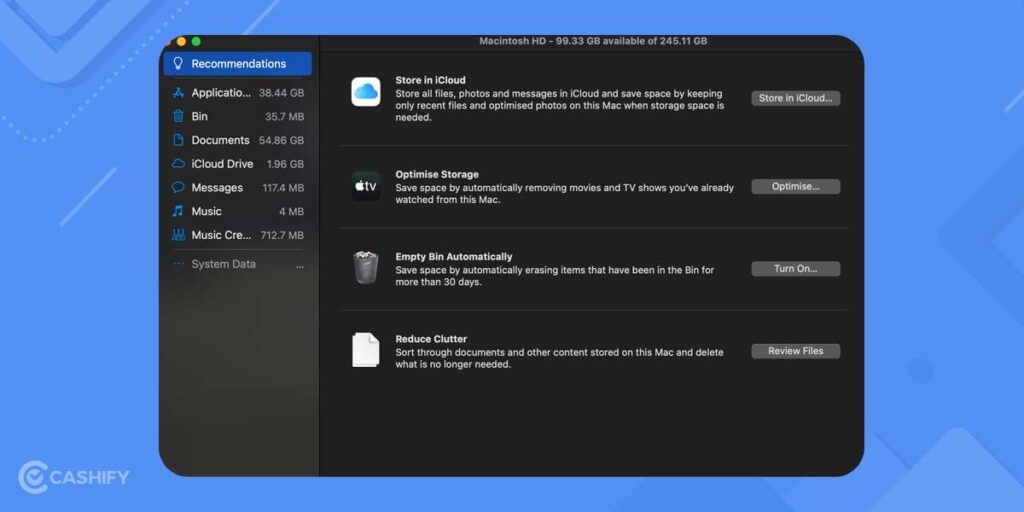
Another recommended setting is to set your Recycle Bin to empty itself periodically. You can even set it to automatically empty recycle bin every 30 days. This can help automate the cleaning process for all the useless files that you have moved to the trash.
Method 2: Migrating Data to iCloud or other cloud services
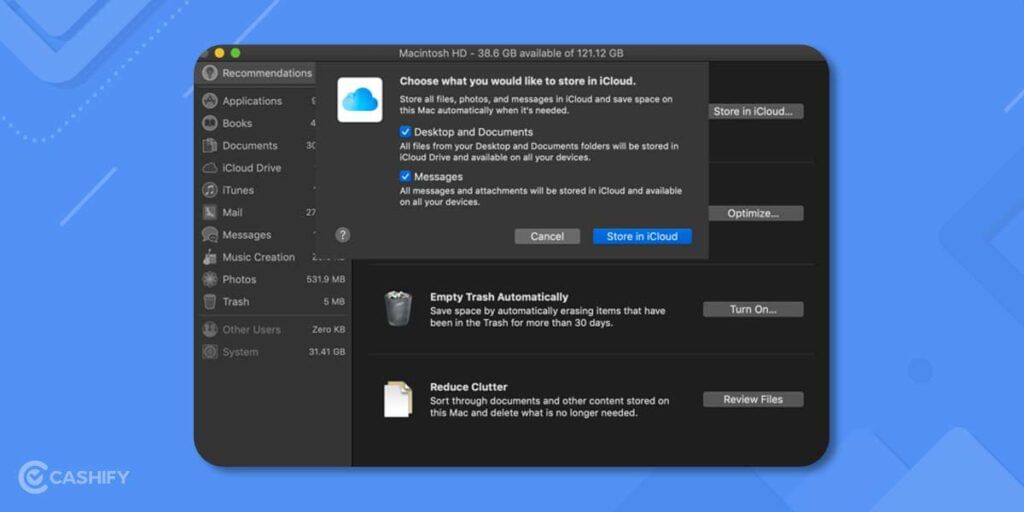
Moving your files to an external hard drive or to cloud storage is another great method to clean up your mac and free up some storage on your Mac. The first idea is to move all your media files including photos, videos and music files to an external hard drive. If an external HDD is not available you can opt for cloud storage services. You can simply upload these files to these services and free up space on your MacBook.
Enabling iCloud service and syncing all your files is a good option to take advantage of Apple’s connected ecosystem. iCloud is a cloud storage service by Apple that can automatically sync all files from your mac to the cloud and only keep the recent or most-used files on the system.
By default, you get 5GB of storage for free and if you need more you can purchase it. The pricing is Rs. 75 for 50GB, Rs 219 for 200GB and Rs. 749 for 2TB. Overall iCloud is worth the price and if you own an iPhone as well then its totally worth it as you can free up some additional storage on your iPhone as well using the same subscription plan.
Also Read: iCloud: How To Use It, Features, Pricing, And More!
If you are not ready to opt for a paid subscription plan, then you can try out Google Drive. This is a cloud file storage service by Google and it offers 15GB of storage for free.
Also Read: Top 5 Cloud Storage Apps for iOS And Android
Method 3: Uninstall Apps That You Don’t Use
Ironically you don’t have a built-in dashboard where you can batch uninstall your unwanted apps. The default method is to navigate to ‘Finder’, and then navigate to the ‘Applications’ section to look for all the installed apps. Now browse through all these apps, look for unwanted apps and remove them one by one.
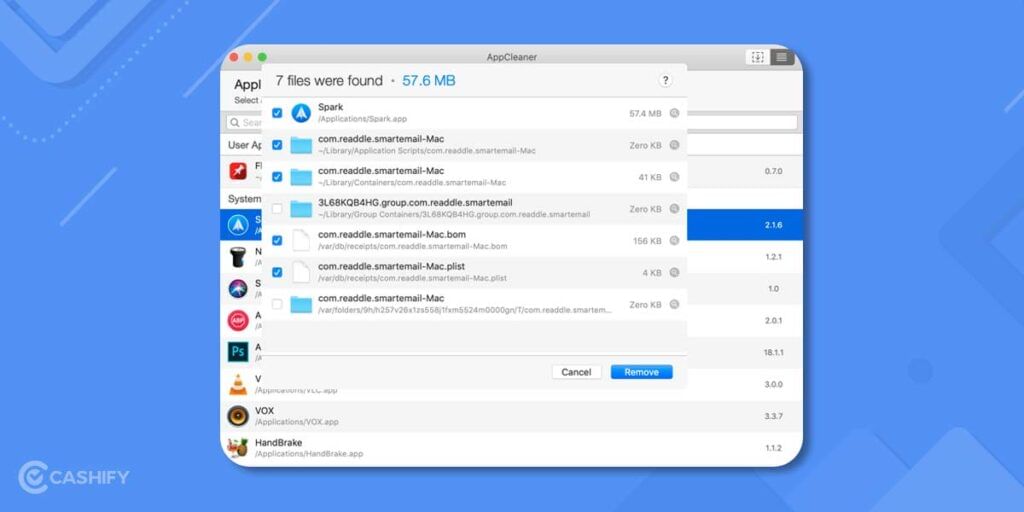
You can even use 3rd party apps like ‘AppCleaner‘ than can help in cleaning up your mac by uninstalling apps from your mac. The best part about this app is that it removes all the hidden files and directories related to the app.
Also Read: How To Transfer Files From Mac To PC?
Method 4: Delete unused language files
By default, the macOS comes loaded with more than 180 language packs and most of these are unnecessary. This chunk of language packs consumes about 1.5-2GB of internal storage, and it’s a good idea to get rid of it. Here is a step-by-step guide on removing unused language files.
1. Navigate to the ‘Applications’ folder and select any app, or at the top-right menu section and clock on ‘Show Package Contents’
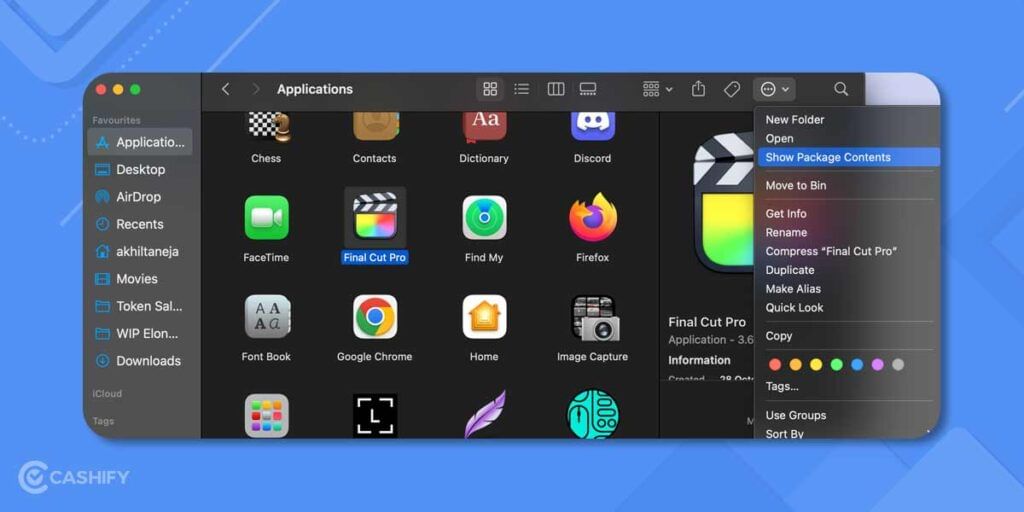
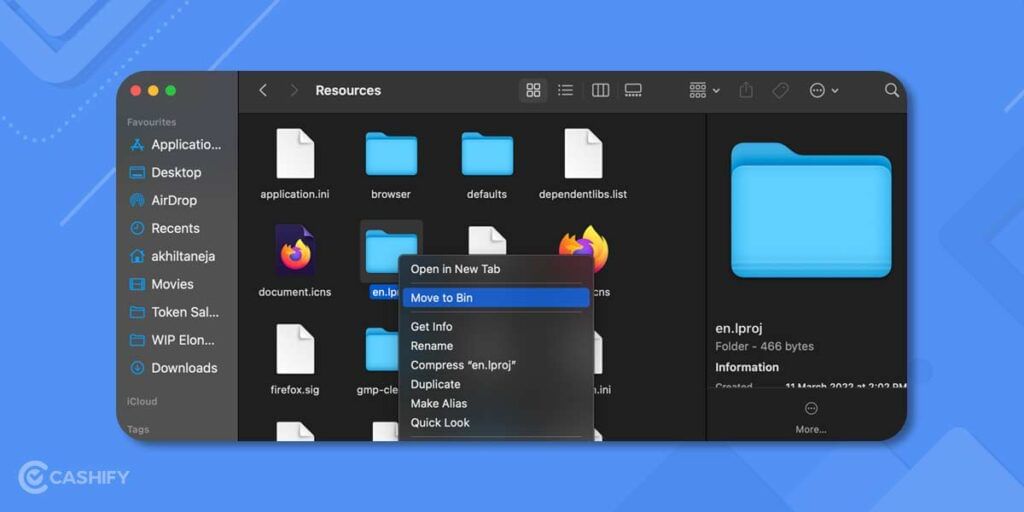
2. Now open the ‘Contents’ folder and navigate to the ‘Resources’ folder.
3. Now look for all files that end with “.lproj” where the first two letters before the dot represent the language. For instance, ‘en’ is for English. And you have to remove all these language folders that you do not need.
Also Read: How To Take A Screenshot On Macbook?
Method 5: Delete Unwanted Mail Attachments
The default email app on your Mac might not be of much use and rarely do people use this app. But if you are one who uses the Mail app then you should be aware that the app keeps on syncing your emails in the background. And might even automatically download the attachments to your system. Here are the three settings that you should change to avoid unwanted email and their attachments to download on your system.
Stop Mail Attachments Auto-Download
- Navigate to the ‘Mail’ app, select ‘Preferences’ and look under the ‘General’ tab.
- Now, look for ‘Remove unedited downloads’ and set it to ‘After Message is Deleted’.
Erase Junk Messages
- Under the same settings, navigate to ‘Accounts’ tab on the top.
- Look for ‘Erase junk messages’ option and set it to ‘After one month
These all setting should avoid downloading unwanted email attachments and email data to your system and help to clean up mac and free some extra storage.
Also Read: What Is Other Storage On Mac And How To Clean It?


