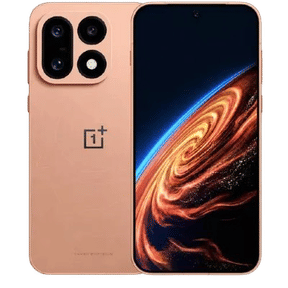


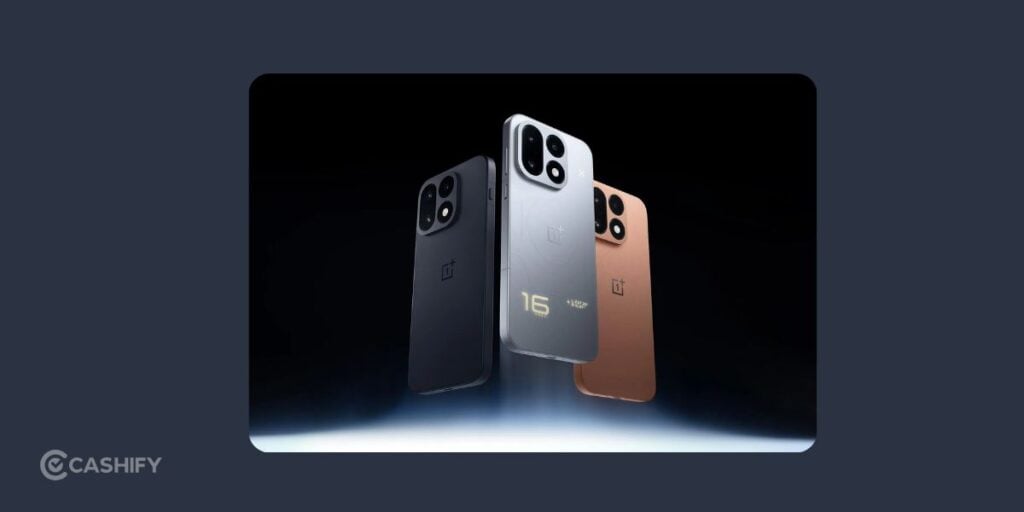
The OnePlus 16 camera settings can help you take sharper photos, capture natural skin tones, and get better night shots. You can also click cinematic travel photos without spending hours editing them. Its 200-megapixel main camera, 50MP ultrawide camera, and 50MP periscope telephoto camera give you plenty of options for different shots.
The trick is knowing which mode to use. You don’t need to shoot every photo at 200MP or use manual controls every time. The default camera mode works well for everyday shots. You can try Master Mode, High-Pixel Mode, and Nightscape when you want more control.
In this article, we’ll explore the best OnePlus 16 camera settings for different situations. We’ll also cover useful OnePlus 16 camera specs and simple tips to help you take better photos.
Also read: The Best Smartphones To Buy During This Big Billion Days Sale!
OnePlus 16 Camera Specifications At A Glance
The OnePlus 16 camera system combines a high-resolution main sensor with dedicated ultrawide and telephoto cameras. Here’s a quick look at the hardware described in the supplied specifications.
| Camera | Specifications | Best use |
|---|---|---|
| Main camera | 200MP, f/1.6, OIS | Everyday photos, landscapes and low-light shots |
| Ultrawide camera | 50MP, 116 degree field of view | Buildings, group photos and wide landscapes |
| Periscope telephoto | 50MP, 3x optical zoom, 6x lossless zoom, OIS | Portraits, distant subjects and travel |
| Front camera | 50MP with autofocus | Selfies, video calls and vlogging |
One thing to remember: the main camera doesn’t use its full 200-megapixel resolution for every default photo. Pixel binning combines information from multiple pixels to help capture light and control noise. You can switch to High-Pixel Mode when you need more detail or plan to crop the image later.
Best OnePlus 16 Camera Settings for Everyday Photography!
If you want good photos without adjusting every slider, start with these settings. You can change them later based on the scene.
| Camera setting | Recommended option | Why it helps |
|---|---|---|
| Camera mode | Photo or Master Auto | Good starting point for everyday pictures |
| Aspect ratio | 4:3 | Uses the full sensor area for the image |
| ISO | Auto, or ISO 50 to 200 outdoors | Helps keep images clean in bright light |
| Shutter speed | Auto for casual photos | Lets the camera adapt to changing light |
| White balance | Auto | Keeps colours looking natural in most scenes |
| Exposure | 0 EV as a starting point | Avoids unnecessary brightness changes |
| Focus | Autofocus | Works well for most everyday subjects |
| Grid lines | On | Helps keep buildings and horizons straight |
| File format | JPEG/HEIF for sharing; RAW for editing | Balances convenience and editing flexibility |
These are starting points, not fixed rules. A fast-moving pet needs a faster shutter speed than a still landscape, and a dimly lit room needs a different approach from a sunny street.
Also read: Google Pixel 10 Pro Best Camera Settings
1. Use Master Mode for Natural-Looking Photos
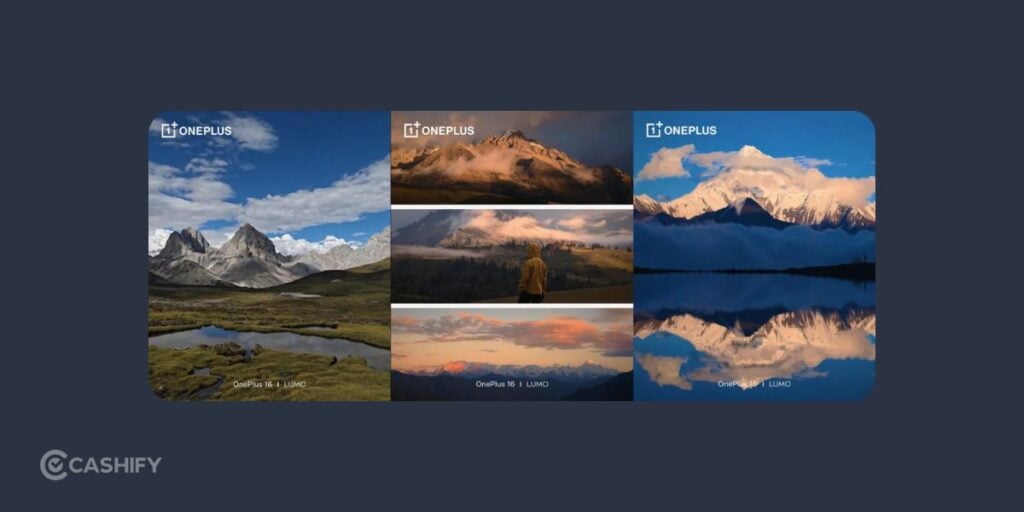
Master Mode is one of the most interesting camera features in the OnePlus 16. It’s designed to give photos a film-inspired look, with more natural rendering of light and less aggressive processing.
This mode is worth trying if you find the default camera produces colours that look too saturated or photos that appear overly sharpened.
Recommended settings:
- Mode: Master Auto
- Aspect ratio: 4:3
- ISO: Auto
- White balance: Auto
- Exposure: 0 EV to start
- Format: JPEG/HEIF for quick sharing, RAW for editing
Master Mode also includes a Pro option for manual controls. Use Auto for quick shots and switch to Pro when you want more control over exposure, focus and colour temperature.
My suggestion is to try Master Mode for street photography, portraits, sunsets and travel photos. It gives you a useful alternative to the standard Photo mode without requiring manual adjustments for every shot.
2. Switch To High-Pixel Mode For Maximum Detail
The 200-megapixel main camera is the headline hardware upgrade, but you don’t need to use its full resolution all the time.
The default camera combines pixels to help gather light and reduce image noise. High-Pixel Mode uses the full resolution of the main sensor, making it useful for scenes where fine detail matters.
Use High-Pixel Mode for:
- Landscapes with detailed trees, buildings and distant scenery.
- Architecture where you want to retain small details.
- Travel photos that you might crop later.
- Detailed shots of artwork, products or objects.
There’s a One Shot, Three Crops feature, which lets you create wide, medium and detailed versions from one capture.
Keep in mind that high-resolution photos take up more storage space. In dim light, a regular Photo mode shot can be a better choice because the camera’s standard processing prioritises light gathering and noise control.
Best setting: Use High-Pixel Mode in good daylight, keep the phone steady, and frame the subject carefully.
3. Try 65:24 Widescreen Mode for Cinematic Photos
Want your travel photos to look different from ordinary phone pictures? Try the 65:24 Widescreen Mode.
Its extra-wide frame is inspired by the panoramic look associated with Hasselblad XPan photography. It works well for scenes that have a strong horizontal composition.
Use it for:
- Mountain ranges and open landscapes.
- City skylines and busy streets.
- Beaches, sunsets and coastal roads.
- Architectural shots with long horizontal lines.
For the best results, look for a scene that stretches across the frame. A wide format doesn’t automatically improve a photo, so avoid using it for tightly framed portraits or subjects that need more vertical space.
You can also experiment with vertical compositions for a tall, scrolling panorama effect.
Also read: OnePlus 15: Best Camera Settings for Night Mode, Portrait & Zoom!
4. Set Up The OnePlus 16 Camera for Portraits

For portraits, the main goal is simple: keep the face sharp, preserve natural skin tones and avoid excessive background blur.
The OnePlus 16’s dedicated telephoto camera is useful here. Its 3x optical zoom can help you frame a person from a comfortable distance. The Portrait mode gives you control over the depth-of-field effect.
Recommended portrait settings:
- Mode: Portrait or Master Mode.
- Zoom: 2x to 3x, depending on the available lens options.
- Focus: On the subject’s face.
- Exposure: Slightly lower if the face or background highlights look too bright.
- Background blur: Start with a moderate setting.
For outdoor portraits, try standing in open shade rather than under harsh midday sunlight. This can soften shadows across the face.
If the background is bright and the subject looks dark, tap the face to adjust focus and exposure. In Pro mode, use spot metering to measure light from the face separately from the rest of the scene.
One more tip: don’t push the blur slider to its maximum. A little background separation often looks more convincing than an artificial-looking blur around hair and shoulders.
5. Best OnePlus 16 Camera Settings for Night Photography
Night photography is tricky because the camera needs to capture enough light without introducing too much noise or blurring moving subjects.
The OnePlus 16’s large main sensor, f/1.6 aperture and optical image stabilisation should make the main camera a sensible starting point for low-light shots. Actual image quality still depends on processing and the scene.
Here are the settings I’d start with.
For beginners:
- Open Nightscape.
- Use the main camera.
- Keep the phone steady.
- Avoid digital zoom when the light is poor.
- Let the night mode finish its exposure before moving the phone.
For manual photography:
| Setting | Starting point |
|---|---|
| ISO | 400 to 800 |
| Shutter speed | Start around 1/30s to 1/60s for static scenes, then adjust |
| White balance | Auto, unless the lighting looks too yellow or blue |
| Exposure | Reduce slightly if streetlights are blown out |
| Stabilisation | Use OIS and support the phone on a stable surface |
These manual settings depend on how much light is available. A shutter speed of 1/30 second can work for a still scene, but it may blur people walking through the frame.
For buildings, night skies and static landscapes, try a longer exposure while resting the phone on a tripod or stable surface. The built-in Long Exposure mode is useful for light trails and moving water.
My tip: Use the main camera first at night. Zooming into a distant subject can introduce more noise and reduce detail, so switch to the telephoto camera only when the lighting is good enough.
6. Best Settings For Action Shots, Kids and Pets
A moving subject needs a different approach from a landscape. If you use a slow shutter speed, you may get a sharp background and a blurry subject.
For action shots, prioritise shutter speed over low ISO.
| Setting | Recommendation |
|---|---|
| Mode | Photo mode or Pro mode |
| Shutter speed | Start at 1/500s; use 1/1000s or faster for rapid movement |
| ISO | Auto or increase as needed |
| Focus | Continuous autofocus, if available |
| Shooting method | Burst mode, if available |
Try to photograph your subject in good light. Faster shutter speeds let in less light, so the camera may need a higher ISO to compensate.
Burst shooting is helpful for kids playing, pets running or someone jumping. Instead of hoping one frame captures the perfect moment, you can select the sharpest photo from the sequence.
Also read: Master The OnePlus 13 Camera: 5 Pro Tips for Stunning Photos!
7. OnePlus 16 Best Camera Settings for Food Photography
Food photos can look artificial if the colours are too strong or the camera makes the dish appear unnaturally bright.
For a natural result, try these settings:
- Use Photo mode or Master Mode.
- Start at 1x zoom, then try 2x if it gives you a better composition.
- Use natural window light when possible.
- Tap the food to focus on its main detail.
- Lower exposure slightly if white plates or shiny surfaces look too bright.
- Keep white balance on Auto unless the food looks too yellow or blue.
Avoid using the ultrawide camera too close to a plate. It can distort the shape of the food near the edges. A standard or moderate telephoto framing often looks more natural.
If the colours appear too punchy, edit the saturation down slightly rather than applying a strong filter.
8. Best Macro and Close-Up OnePlus 16 Camera Settings
Close-up photos of flowers, jewellery, textures and small objects need careful focus. At short distances, even a tiny movement can change which part of the subject looks sharp.
Start with the main camera or telephoto camera, depending on the minimum focusing distance and the composition you want.
Try these tips:
- Use bright, even lighting.
- Keep the phone steady.
- Tap the most important detail to focus.
- Switch to manual focus if autofocus keeps hunting.
- Use focus peaking or magnification if those tools are available in Pro mode.
- Avoid pushing the phone closer if the lens can no longer focus.
A tripod or stable surface can help with still subjects. For reflective objects such as glass or jewellery, move the light source slightly to control unwanted reflection
9. Best Selfie Settings on the OnePlus 16
The 50-megapixel front camera described in the supplied specifications includes autofocus, which is useful for selfies and close-up video.
For everyday selfies, you don’t need to switch to a professional mode. Good lighting and sensible framing usually matter more.
- Use Photo mode for quick selfies.
- Face a window or another soft light source.
- Tap your face if the camera focuses on the background.
- Avoid strong backlighting unless you want a silhouette.
- Use the screen flash in dark settings if it looks natural.
- Keep beauty or retouching effects subtle.
For group selfies, make sure everyone fits comfortably inside the frame. If the camera supports different focal lengths or framing options, choose the one that includes the group without stretching faces near the edges.
10. Best OnePlus 16 Pro Mode Settings Explained
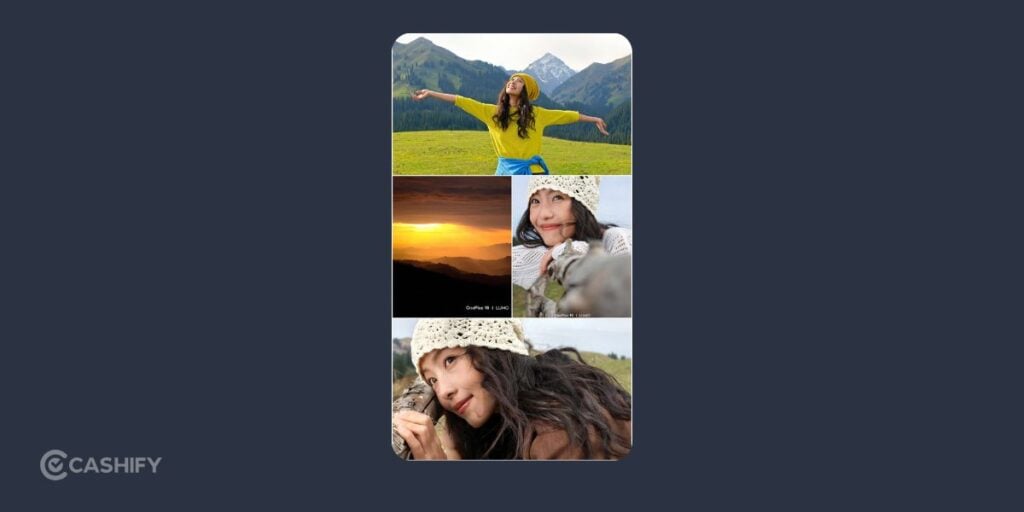
If you want to move beyond automatic photography, Master Mode’s Pro controls are worth learning. You don’t have to understand every control on day one. Start with ISO, shutter speed and exposure, then experiment with focus and white balance.
ISO: Keep it low when the light allows
ISO controls the camera’s sensitivity to light. A lower ISO generally produces a cleaner image, while a higher ISO can help you capture a brighter photo in dim conditions at the cost of more noise.
Suggested starting points:
- Bright daylight: ISO 50 to 200.
- Indoor lighting: ISO 400 to 800.
- Low light: ISO 800 to 1600, if needed.
These aren’t strict limits. If a moving subject requires a fast shutter speed, a higher ISO can be the right trade-off.
Shutter speed: Control motion and brightness
Shutter speed determines how long the camera captures light.
| Situation | Starting shutter speed |
|---|---|
| Everyday handheld photos | 1/125s to 1/250s |
| Walking subjects and pets | Around 1/500s |
| Fast action | 1/1000s or faster |
| Light trails | Several seconds |
| Moving water | Experiment with slower speeds |
A slower shutter can make water look smooth or turn vehicle headlights into light trails. It can also blur your subject if the person or object moves during the exposure.
OIS helps reduce blur caused by small movements of your hands, but it cannot freeze a moving subject.
Exposure compensation: Fix brightness quickly
Exposure compensation lets you make a photo brighter or darker without adjusting every setting.
- Try -0.3 to -1.0 EV if bright skies or streetlights lose detail.
- Try +0.7 to +1.5 EV for a backlit subject that looks too dark.
- Start at 0 EV for ordinary scenes.
Use the preview as your guide. The numbers are starting points, not rules for every scene.
White balance: Keep colours looking natural
White balance controls the colour temperature of a photo. It helps prevent indoor lighting from turning skin yellow or outdoor scenes from looking too blue.
Auto white balance is fine for most photos.
If you want manual control, try these starting ranges:
- Daylight: around 5000K to 6500K.
- Warm indoor lighting: around 3000K to 4500K.
You can adjust the temperature until white objects look reasonably neutral and skin tones look natural. If you’re photographing a series of images in the same lighting, a fixed white balance can also help keep the colours consistent.
Aspect ratio: Use 4:3 for full-frame photos
Use 4:3 for most photographs if you want to retain the full image area captured by the sensor. Choose 16:9 for a wider composition or 1:1 for square social media posts.
Remember that changing the aspect ratio can crop the image. A wider shape doesn’t automatically mean higher image quality.
RAW or JPEG/HEIF: Which should you choose?
Choose JPEG or HEIF for everyday photos that you want to share quickly. These files are processed and generally take up less storage than full-resolution RAW images.
Choose RAW if you plan to edit exposure, shadows, highlights and colour in an editing app. RAW files retain more editing information but require extra work and storage.
If the camera supports RAW plus JPEG/HEIF, you can save both versions for important shots.
Turn on grid lines and the histogram
Two small tools can make a real difference to your photos.
- Grid lines: Help you straighten horizons and align buildings.
- Level indicator: Helps you avoid tilted landscapes.
- Histogram: Shows how brightness is distributed across an image. Clipping at the left edge can mean lost shadow detail, while clipping at the right can mean blown highlights.
- Face metering: Helps prioritise exposure for a person’s face in a high-contrast scene.
You don’t need to watch the histogram for every photo. Use it when you want more precise control over difficult lighting.
Also read: Samsung Galaxy S26 Ultra Vs iPhone 17 Pro Max Camera: Getting Killer Shots!
12. Other OnePlus 16 Camera Features Worth Trying
Beyond the standard Photo and Pro modes, the supplied feature brief lists several creative tools.
Long Exposure
Useful for light trails, moving water and creative night shots. Keep the phone on a tripod or stable surface for the best results.
Tilt-Shift
Adds a miniature-style effect to cityscapes and landscapes. It works best on scenes photographed from an elevated viewpoint.
Underwater Mode
Designed for underwater photography. Check the manufacturer’s underwater-use instructions before taking the phone into a pool or open water.
Dual-View
Useful for recording yourself and the scene in front of you in the same video, if supported by the camera app.
The phone has multiple IP water-resistance ratings, but that doesn’t make it waterproof in every situation. Water resistance can decline over time, and pool chemicals or salt water can cause damage. Don’t treat an underwater mode as a guarantee of safe underwater use.
Play with other features like Live Photos, 4K Live Photos and Gallery AI tools such as AI Eraser, AI Unblur and AI Retoucher. These can help clean up a shot or recover some visual detail, but results depend on the image. AI tools cannot reliably recreate every missing detail.
Final Thoughts
The OnePlus 16 best camera settings depend on what you’re shooting, but Master Mode, High-Pixel Mode and Nightscape are great starting points. The OnePlus 16 camera upgrade makes photography more versatile, from detailed landscapes to portraits and night shots. Experiment with different modes and find what works best for your style.
If you’ve just bought a new phone and don’t know what to do with your old phone, then here’s your answer. Sell your old mobile to Cashify and get the best price for it. If you are planning to buy a new phone, check out Cashify’s refurbished mobile phones. You can get your favourite phone at almost half price with a six-month warranty, 15-day refund and free delivery.