With the progressive development of the web-world, now we get the required services at our fingertips. We just download different applications and make them perform as per our needs. Starting from our smart home to our social media profiles, there are different apps present for everything. But what if you get a platform that offers full automation for managing all types of apps, devices, and services? Isn’t it great to eliminate all the manual work you do and put the internet to work for you?
Also read: Smartphone reviews
Thanks to the IFTTT platform, which works like a single tool and offers the ultimate automation service that you need to manage your internet-connected things conveniently. You just need to join and create your account on the IFTTT app or website to integrate all your channels.
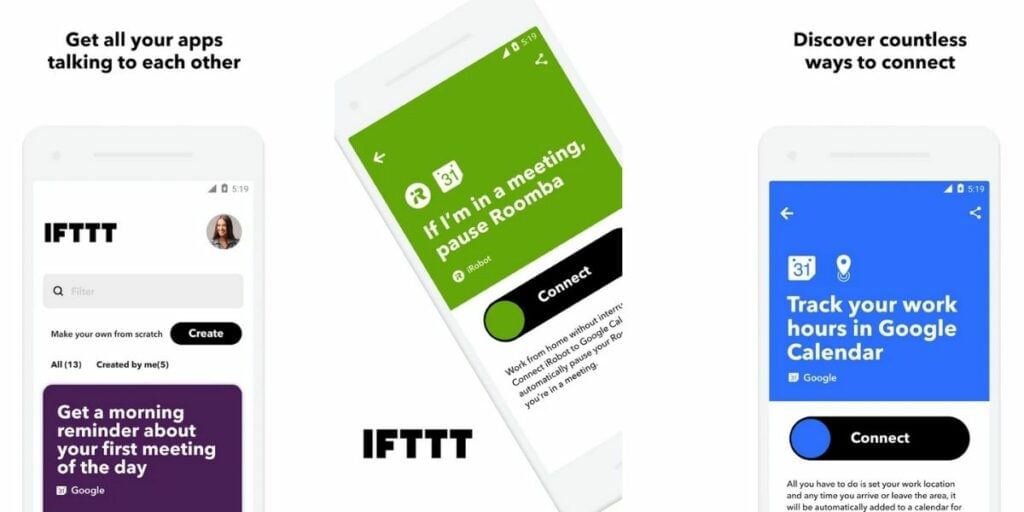
Yes, with this platform, you can carry off any work like operating your iRobot vacuums, or Alexa to changing profile pictures on Facebook or taking a backup for your Instagram photos. So, without further second’s delay, let’s learn, what is IFTTT and how to make the best use of it? Here you go!
Also read: Best Mobile Phones Under 50,000
What is IFTTT?
IFTTT stands for “if this, then that” As the full form suggests, the platform works just in the same way. You need to create a recipe here to get different services from the channels you connect through this platform. However, you can connect over 300 services together to complete your tasks automatically. The resulting combinations of your services are called Applets.
These Applets generally take care of your daily workflow by integrating full automation. You can connect your websites, smart home devices, your social media profiles, and more to this platform.
Also Read: The Best Android VPN Apps 2020 Edition
For example, suppose you have a smart bulb in your home, now you want it to blink every time you get an email, or get tagged in a Facebook post- Well, it’s easily doable with the IFTTT platform. Moreover, even if you want to receive a notification every time your readers comment on your blog or website, that also can be done with this platform.
Also Read: 7 Best Smartphone YouTubers Every Gadget Lover Should Follow!
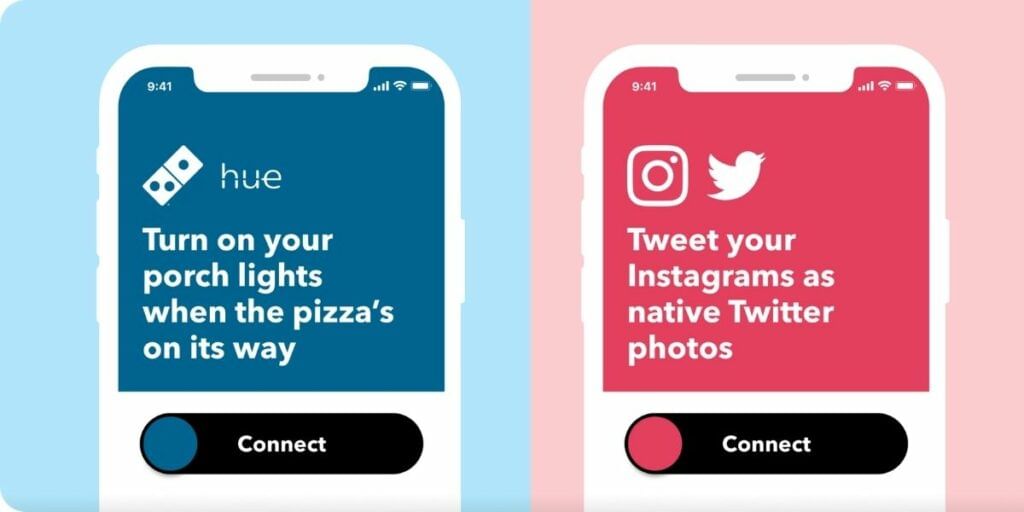
Even you can sync your Amazon Alexa with your Google calendar with the IFTTT services. The best part is, all these services come free of cost. Of course, there are certain limitations. In case you want to remove those limitations, you must spend some bucks and get the IFTTT Pro.
How to Make Most of the IFTTT Platform?
To make the best use of the IFTTT platform, you need to create an IFTTT account first on the website. You only need to put your email, username and password to sign up for your IFTTT account. As soon as you join, there will be on-screen instructions to let you set up your first Applet. Since you are a beginner, creating your first Applet can be a bit tricky for you. Plus, you need to create the recipes properly to come up with different Applets.
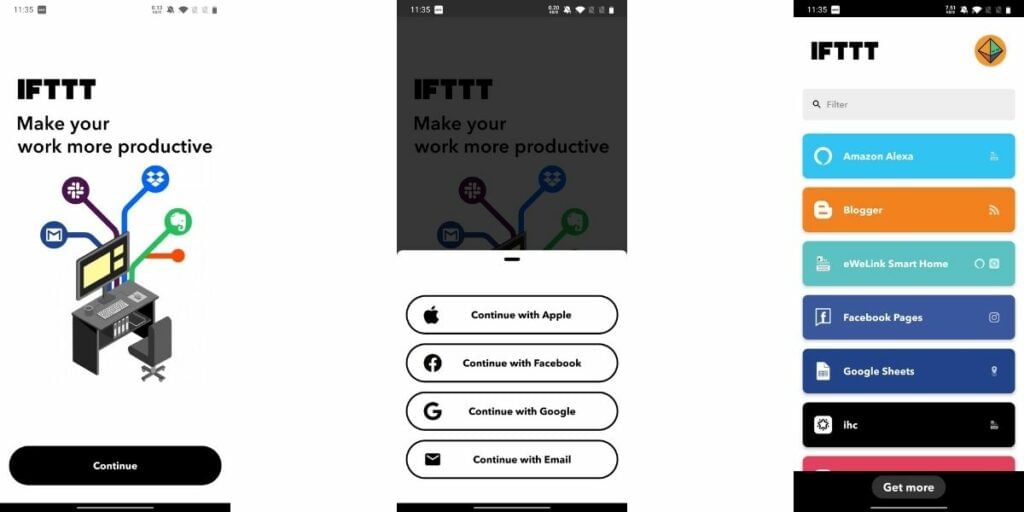
However, no need to worry as we have provided step-by-step guidelines here to make sure you get all required details at your fingertips. Scroll down to have a look.
Also Read: Top 5 Meditation Apps To Keep You Calm During These Tough Times!
How to Set Up an Applet?
Applets can be of different combinations. You can use an Applet that will connect your Alexa with your to-do list or Google calendar. Similarly, you can create an Applet which will save your Fitness tracker’s data on a Google Spreadsheet. Not only that but also there are billions of Applets that can be created and used to manage your daily stuff conveniently. How? Check it out below.
Here we are giving an example of creating an Applet for your Instagram and Twitter account.
Step 1: At first, log in to your IFTTT account using your credentials
Step 2: Now navigate to your username and click My Services
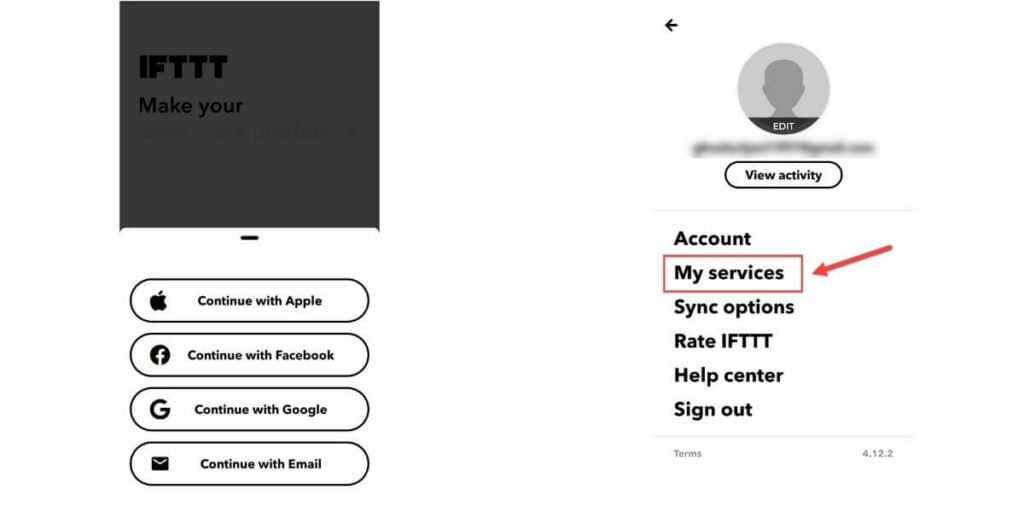
Note: You may find some auto-generated Applets which got created depending on the account information you’ve provided.
Step 3: Next, search for a channel, i.e., Instagram, for which you would like to get a relevant Applet
Step 4: At this point, select the particular Applet that you want to use
Note: Say, you want to tweet your Instagram photos. So, you have to choose the particular Applet which tweets your Instagram photos automatically.
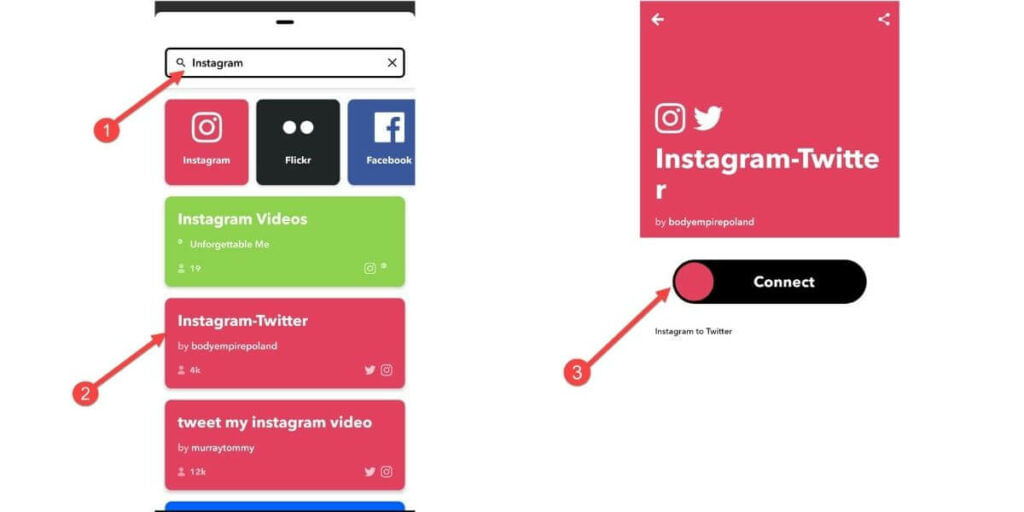
Step 5: Once you pick the Applet of your choice, click on the Turn on the button associated with the same
Step 6: Now, you will be asked for your permission to access your Instagram and Twitter; here, click OK
Step 7: Finally, when you authorize access to each of the services, you’ll be redirected to the turned-on Applet page
Note: If you want to see your list of Applets, click on the My Applets option placed at the top of your IFTTT dashboard.
Now you know how to activate an Applet from already existing recipes. But what about applying new recipes and creating your customized Applet? Well, we’ve got you covered and shared the required details below. Have a look.
Also Read: Top 5 Smartphones In 2020 With Best Cameras!
How to Create Different Recipes for Applets?
This process is also easy to perform like the above one. Here you need to understand the full form of IFTTT- “If This Then That,” to create your own recipe and get Applet according to that. However, follow the below steps to customize your own Applet. Here we have provided the example for Twitter. Take a look.
Step 1: Firstly, log in to the IFTTT website using your credentials
Step 2: Next, locate your username and click on the New Applet
Step 3: Here, you have select the “This” of “If This Then That”
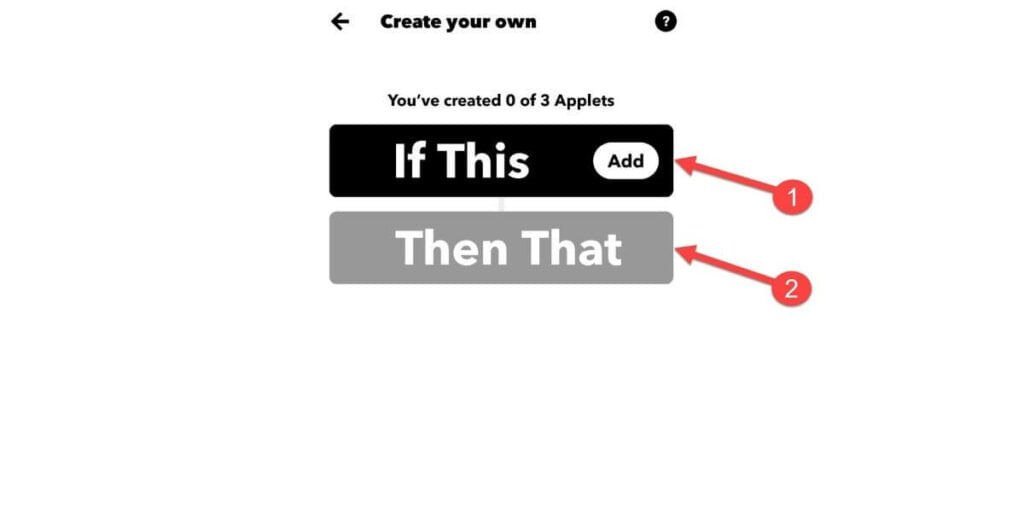
Note: The “If This” of “If This Then That” denotes the “trigger,” which tells your Applet when to run.
Step 4: Now, search and select a service that you want to run, along with that, connect it to your account and authorize full access
Note: Here we are taking the example of Twitter, so we will show the process of getting an Applet for Twitter.
Also read: Best mobile phones under 15000
Step 5: After that, you will get a choice of triggers from where you need to pick one to ensure when to run the Applet
Note: Suppose, you use “New tweet from the search” as the trigger. So, if you’ve searched for a science conference before, then all the new tweets under the same hashtag will be collected.
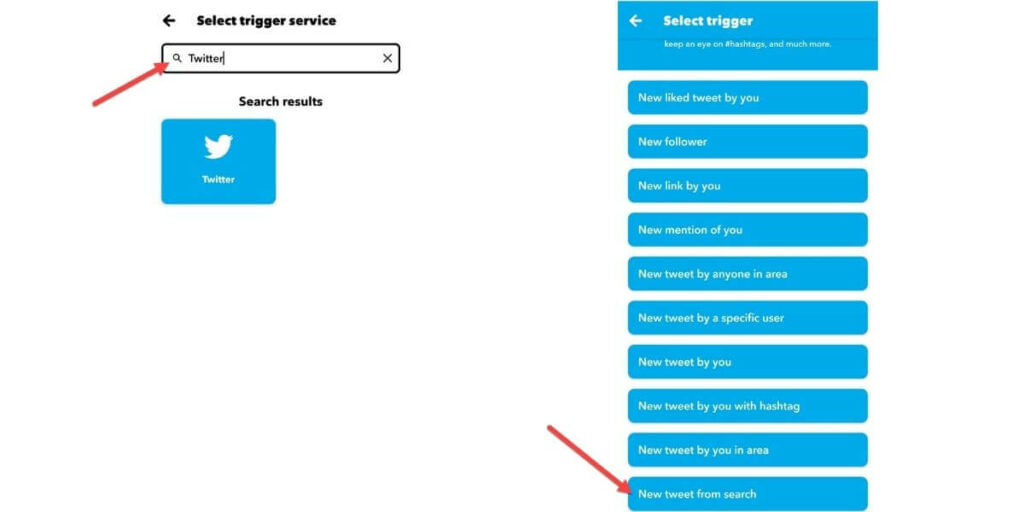
Step 6: At this point, you need to select the “That” of “If This Then That,” you can select it from the same page where you choose. FYI “Then That” defines the action that needs to be performed once the trigger is activated.
Step 7: The “Then That” will work as an “action” service, for example- Suppose, you want all those collected tweets on your email, so you need to click the weekly or monthly email digest option
Note: Doing so, will bundle up all the emails under the same hashtag and send it to your email id.
Step 8: When you successfully create a recipe, review your Applet and click on the Finish button to review and make the Applet live
Note: You can check your newly created Applet under the “My Applet” section. In case you want to reconfigure it, you must adjust the “ingredients,” and click save to finish.
Also Read: Top 5 Flagship Smartphones That You Can Buy Right Now
That’s all! Now you know what is IFTTT, what is the full form of IFTTT and how to create an Applet on IFTTT to make most of it? To add further, there are different IFTTT widgets available that you can use to run certain Applets with a single-button operation on your Android or iOS device. Undoubtedly, IFTTT has made our life and daily workflow easy and convenient.
Also Read: Top 5 Internet Speed Testing Apps
If your phone is facing issues, then you can conveniently get phone repair online through Cashify. You can also sell old mobile to us if you’re planning on buying a new phone.


