Impressed with the new look of Windows 11? Eager to give windows 11 theme for windows 10? Windows 11 was introduced by Microsoft on June 24. 2021. After a week of the announcement the company even started to roll out the insider preview of the new Windows on their developer channel. Many people who are part of the insider program started to use the latest build followed by the earlier Windows 11 insider preview. But Microsoft has made some very confusing requirements due to which many of the PC owners cannot run Windows 11 on their system.
Also Read: How To Check If Your PC Or Laptop Can Run Windows 11?
So if want to experience Windows 11 but your PC is not compatible to run Windows 11. Here is how you can transform your Windows 10 to look like Windows 11.
When we talk about Windows 11, it includes a lot of visual tweaks that separate it from Windows 10. Overall it makes Microsoft’s new OS look cleaner and sleeker than the previous Windows.
One of the easiest ways to make your desktop look like Windows 11 is by using some of its wallpapers. It is not possible to fully recreate the windows 11 theme for windows 10 tweaking the rest of the elements can bring you more visual impact and quite close to Windows 11.
Before you begin with the process make sure you have updated to the latest Windows 10 version. It is also advisable that you backup your OS and your important documents before using these tweaks. Prefer taking a full backup or create a system restore point before you begin.
1. Download and set the Windows 11 Wallpapers
You can download Windows 11 Wallpapers in high resolution from the link below,
- You can go and visit the link below to download the wallpaper zip file.
Download Windows 11 Wallpapers
- The wallpapers are available to download in a zip file on Google drive to be easily accessible for all. This is how you can get windows 11 theme for windows 10.
- After downloading, you can easily set your preferred wallpaper from available choices. Just right-click on the image to see the wallpaper option.
- Select “Set as Desktop Background”. The wallpaper is now set and let’s move ahead and customise your Windows 10 even further.
Also read: How To Combine PDF Files Online For Free
2. Getting the Windows 11 Theme
By default Windows 10 comes with a handful of themes and you get light and dark variants. You can get more themes from the Microsoft store but they don’t offer much visually striking unique look compared to the themes available at sites like DeviantArt. Also, Windows 10 security won’t allow you to install such themes directly unless you force it using a tool that can sidestep the restrictions.
The tools used here are UltraUXThemePatcher and SecureUxTheme. And in this tutorial, we will go with the newer and safer SecureUx Theme.
- You can visit the tool’s GitHub page and download the theme from there.
2. Now you have to create an account at DeviantArt’s website to download the required files. Having an account is necessary because as a guest you can only view the files. Then download Niivu’s Windows 11 for windows 10 theme.
For ease of use, create a new folder with a name such as “Win11_theme”, and save all the files that we will be using during this tutorial in that folder.
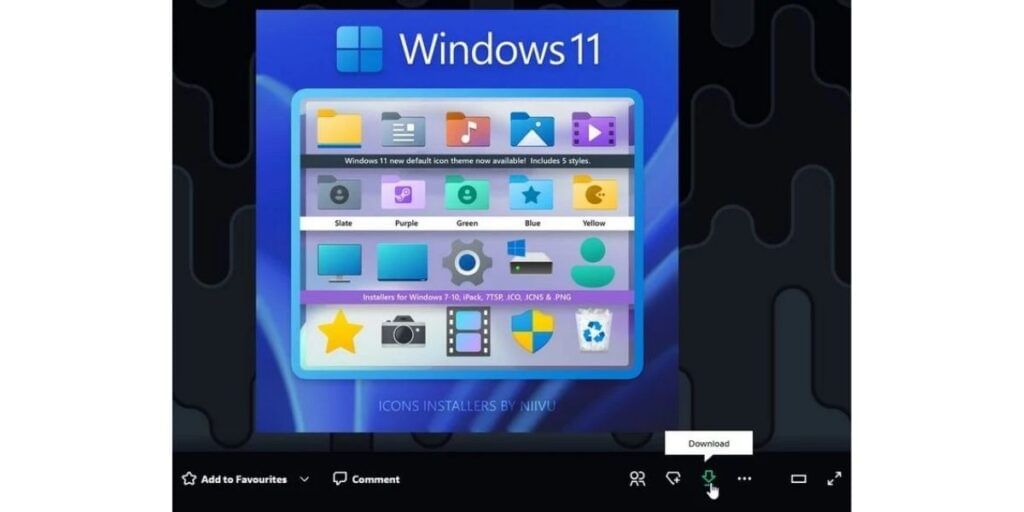
3. Now from the DeviantArt website download the niivu’s Windows 11 icon theme NCVT into the same folder.
4. Extract both of these files into a folder
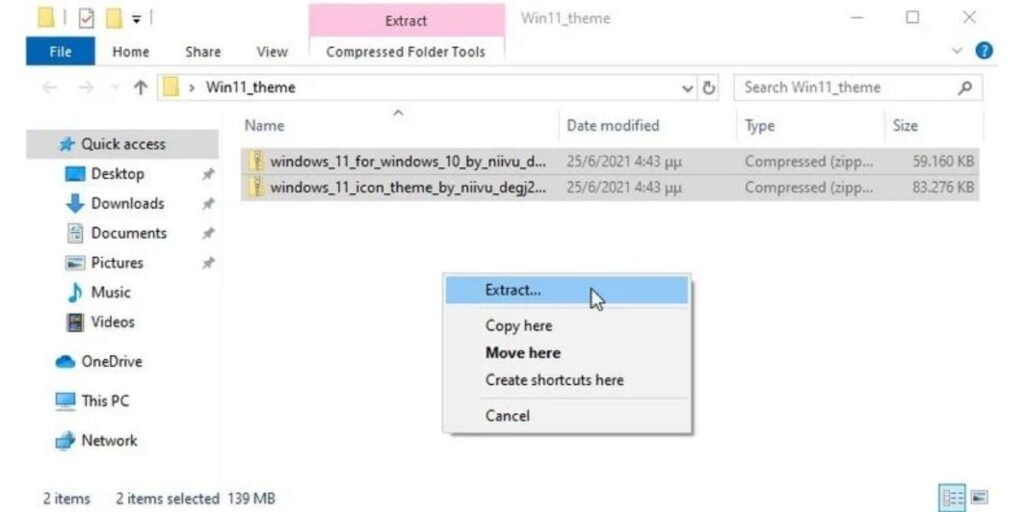
While SecureUxTheme supports Windows themes, but it does not support icons. So you will have to download a different tool for those in one of the most popular options is 7TSP. You can find it from the DeviantArt website and download it together with the windows and icon themes.
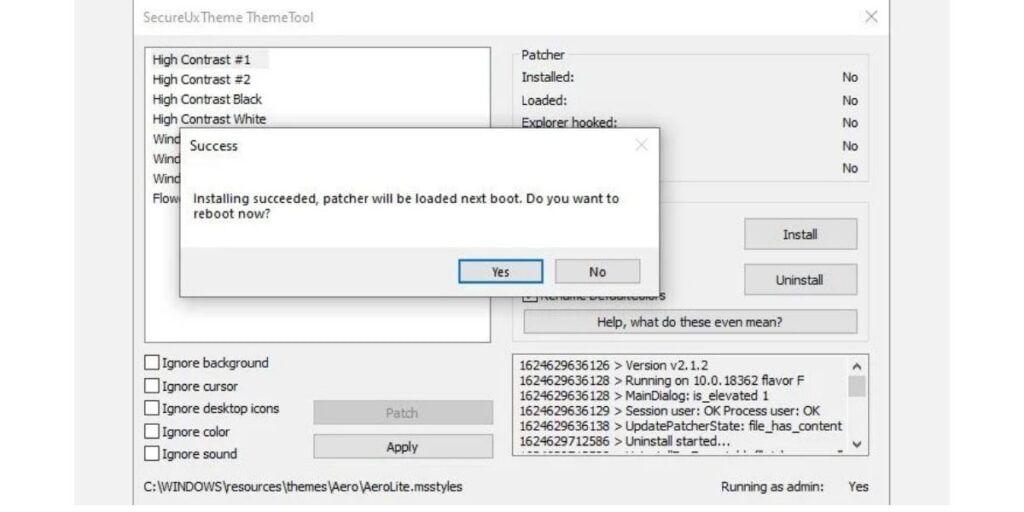
5. Now open the folder where you have saved all the files. Next right click on SecureUxTheme’s file and run it as an administrator. Keep everything the same and click on install on the right side.
6. You will see a message of successful installation popup and it will ask you to reboot. Restart your PC once you have saved everything you were working on.
7. After a reboot, return to the folder where you unpacked the theme and icon files you’ve downloaded. Now, inside the theme’s folder, you’ll find a Windows 10 Themes sub-folder, with two versions of the theme in two more sub-folders.
One offers a regular and the other a “thick” taskbar. Here you can choose anyone from both options, enter the folder, and copy everything you’ll find inside (with keyboard shortcuts CTRL + A and then CTRL + C).
For convenience, run a second instance of File Explorer (Windows Key + F). Then, navigate to C:\Windows\Resources\Themes, and paste the theme’s files there (CTRL + V).
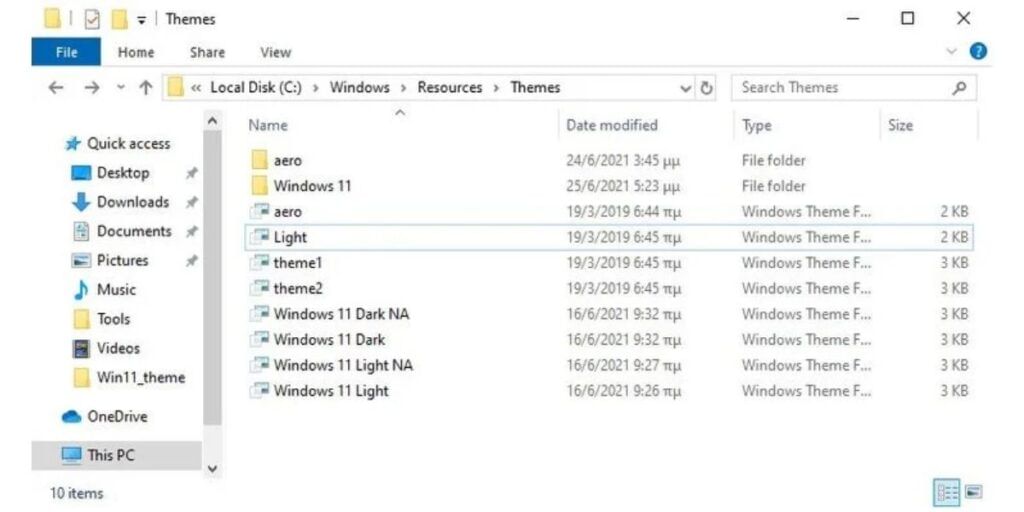
8. Now run SecureUxTheme as administrator again and this time you will find the new theme you added to the Windows 10 themes folder listed on the top left. Choose the dark or light variant that you prefer and apply it to use the selected theme.
For a few seconds, your desktop will be locked and Windows will prompt you to wait while the new theme is applied. When you are back at your desktop the new theme will be used on your Windows. You can now exit SecureUxTheme and keep enjoying Windows 11 theme on your Windows 10.
Also Read: How To Upgrade To Windows 11 From Windows 10 For Free!
3. Getting the Windows 11 icons
Here are the steps to get Windows 11 icons:
- Now for icons you have to download and run 7TSP.
- Under compatibility check, tick the ‘Run this program in compatibility mode for:’ box.
- Now you have to click on add a custom pack and select the icon pack you downloaded.
- Click on “Start Patching” & by default 7TSP will create a restore point & install the contents of the pack.
- Now reboot.
- Once rebooted, you will see all the changes applied.
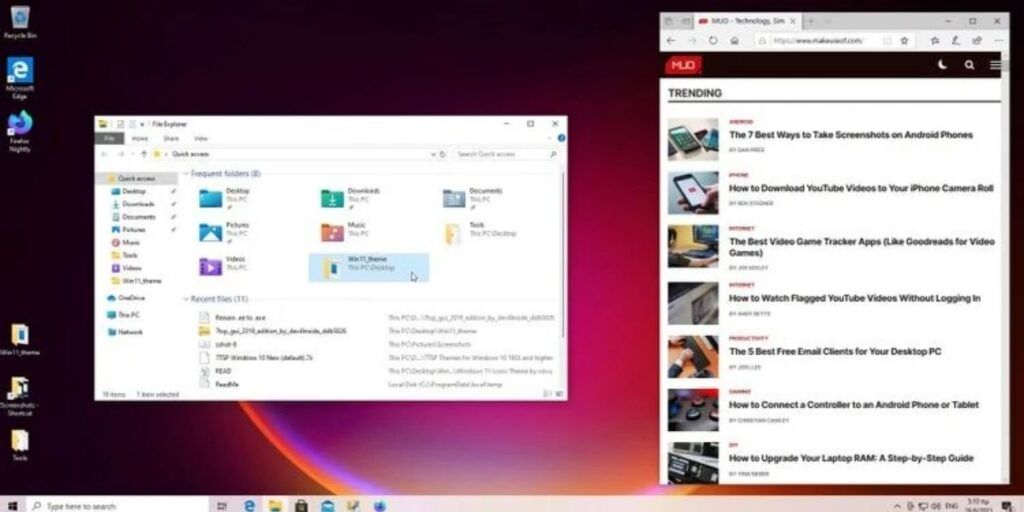
Your desktop will now look somewhat similar to Windows 11, but the job is not done yet as we are not done with the windows 11 theme for windows 10.
Read more: How to Change the Password of JioFi Hotspot
4. Centre icon in the taskbar
Taskbar with icons in the center is the first thing that probably anyone notices that separates windows 11 theme for windows 10. This is the easiest tweak of this tutorial.
You only have to install a program that you may have been using for years and that is TaskbarX.
1. You can download one of the portable versions of TaskbarX from its official website for free. The program does not come with an installer so as soon as you can take the downloaded file you can run it from there.
2. Then you can manually create a shortcut to TaskbarX Configurator on your desktop.
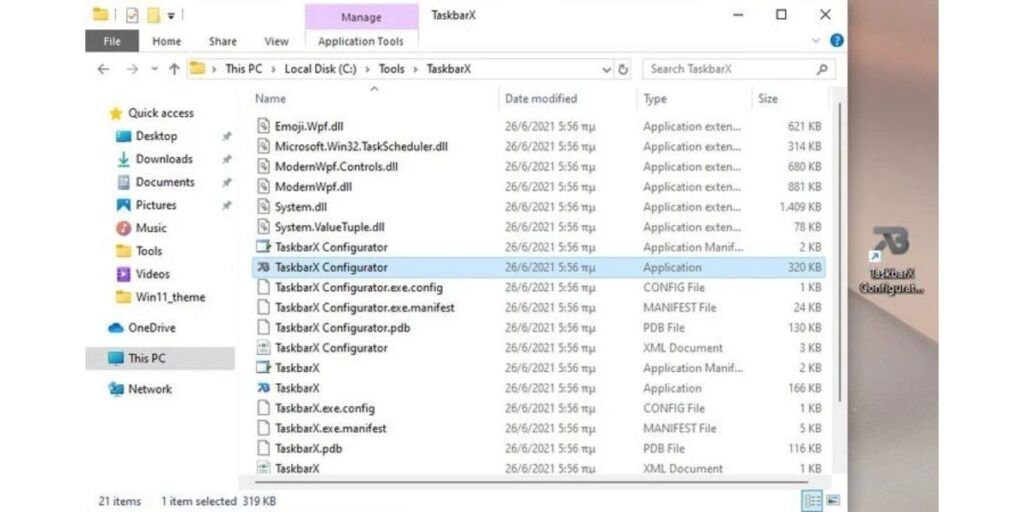
3. You can run the configurator and apply it to the default values that will move your taskbar icons to the center.
You can play with its options to further configure your taskbar like changing its colour, changing between visual modes, and much more.
Also Read: Learn How to Track Someone Using Google Maps
For the latest smartphone news, stay tuned to Cashify. We also allow you to compare mobile phones so you can find out the better phone before buying.


