Connecting a laptop to a projector can be a great way to share your presentations, videos, or images with a larger audience. However, if you are not familiar with the necessary steps, the process of connecting the two devices can seem daunting.
Here in this article, we will guide you through the process of connecting your laptop to a projector in a step-by-step manner to make it easy for you to share your content on a big screen.
How To Connect Laptop To Projector
Whether you are a student, a business professional, or a teacher, knowing how to connect your laptop to a projector is very important and helpful. So let’s dive in and learn how to connect a laptop to a projector in the easiest and the most proper way possible.
Step 1: Check the Ports
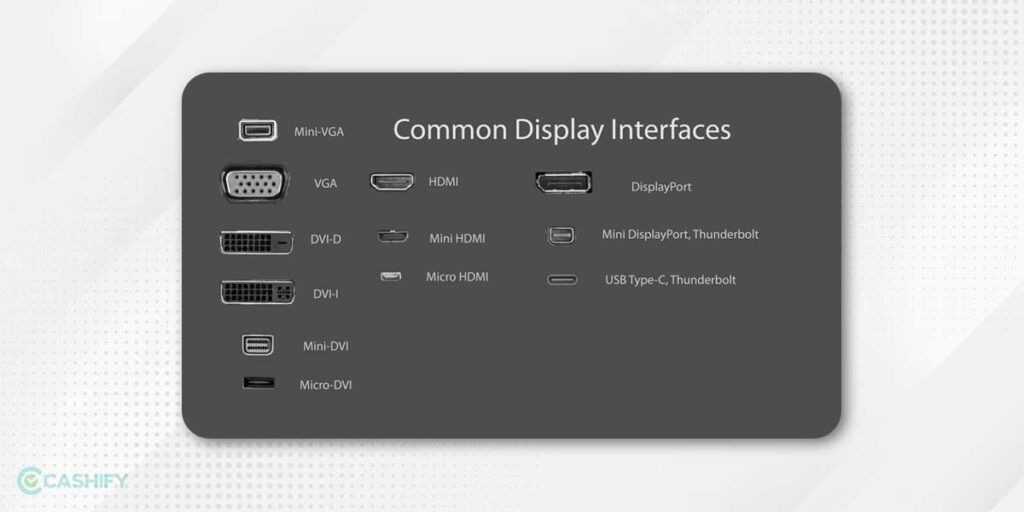
Firstly Before you begin, it’s important to check the ports on both your laptop and the projector. You need to know which types of ports are available so that you can choose the correct cable to connect the two devices. Most modern laptops have an HDMI port or a USB-C/Thunderbolt port that can be used to connect to a projector. Most Projectors have VGA, HDMI, or DisplayPort ports.
If your laptop has an HDMI port and the projector has an HDMI port, you can simply use an HDMI cable to connect the two devices. Or, If your laptop has a USB-C port and the projector has an HDMI port, you can use a USB-C to HDMI adapter to connect the two devices. And, If your laptop is old and has a VGA port and the projector has a VGA port, you can use a VGA cable to connect the two devices.
If your laptop and the projector have different types of ports, you must use an appropriate adapter or converter to connect the two devices.
Also Read: Best Projectors For Your Home Entertainment System
Step 2: Start up the Projector
Once you have identified the correct cable or adapter, it’s time to power up the projector using a switch or remote. Make sure it is plugged in and the bulb is functioning. Most projectors take a few minutes to warm up before they are ready to use, so give it time to start up before you try to connect your laptop.
Step 3: Connect And Setup
Connect one end of the cable to the appropriate port on your laptop and the other end to the corresponding port on the projector. Make sure the cable is securely connected at both ends.
Once the laptop is connected to the projector, you need to adjust the display settings on your laptop to ensure that the image is being displayed properly on the projector. Here’s how to do it in different operating systems:
Also Read: How To Enable Push Notification On iOS?
Setup Projector on Windows:
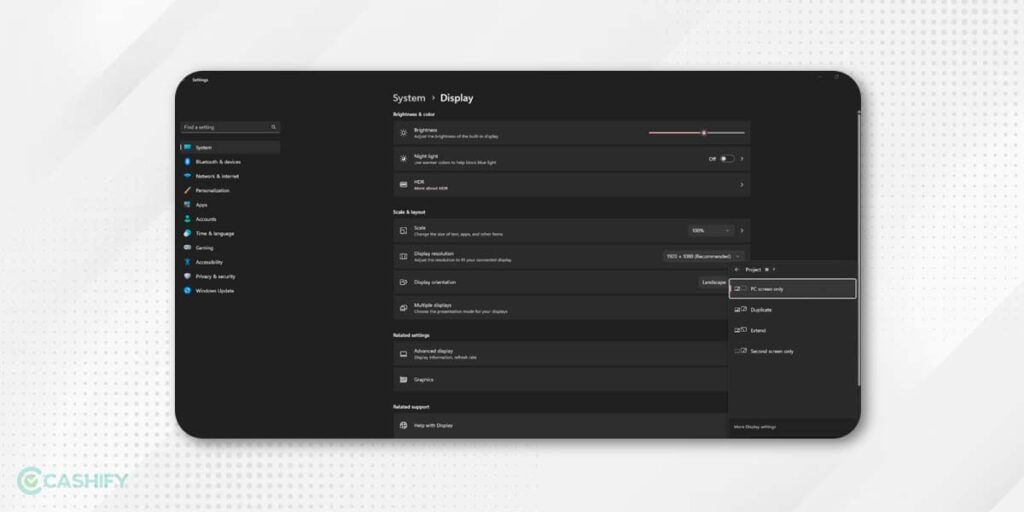
1. Right-click on the desktop and select Display settings.

2. Under the Multiple Displays section, select Extend Desktop or ‘CTRL + P‘. Here you can see multiple options, PC Screen Only, Duplicate, Extend, and Second Screen Only.
Select Duplicate in case you want to just mirror your screen onto the projector. If you want to turn off your laptop’s display and the projector to act like a second display then select “Second screen only” mode.
3. Make sure that the resolution of the laptop/desktop and the projector match. You can adjust the resolution by clicking on the Resolution drop-down menu and selecting the appropriate option.
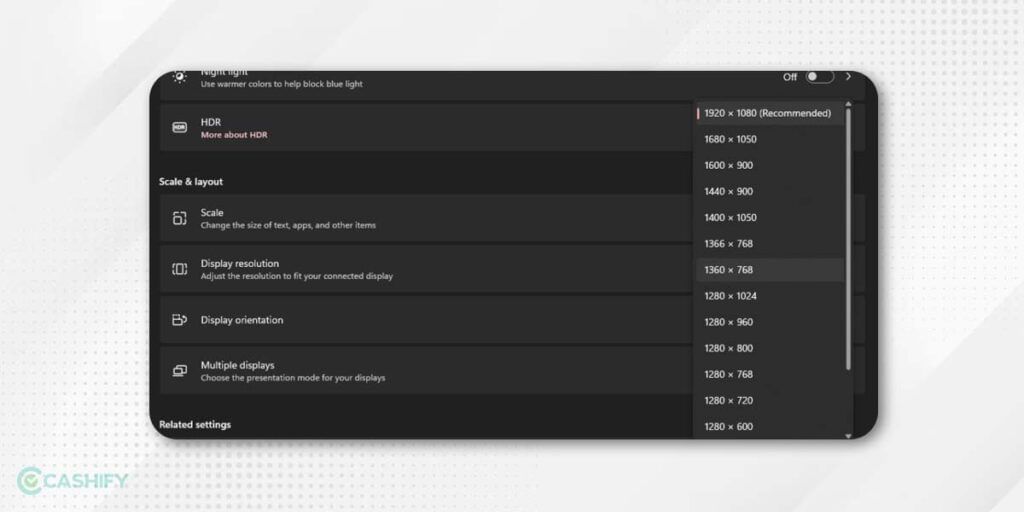
4. Click Apply and then click ‘Keep Changes’ if the content looks good.
Setup Projector on Mac:
1. Click the Apple icon on the top left and select ‘System Settings’.
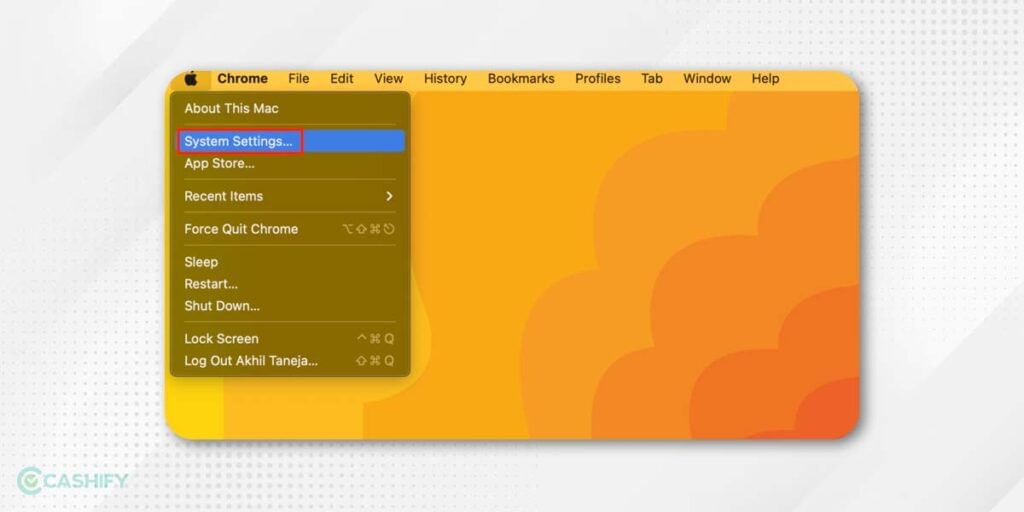
2. Click on ‘Displays‘ and here you can see the second display to modify its settings.
3. You can arrange the relative position of both displays in any orientation by just dragging and adjusting the location of the secondary display.
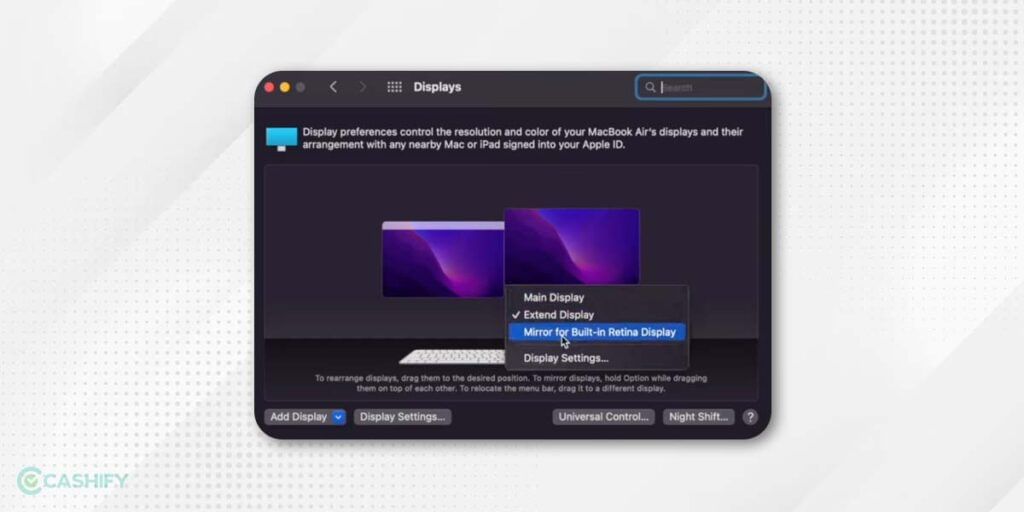
4. You can even adjust the Display Settings to modify the relative settings for the projector.
Setup Projector on Linux:
1. Open the “Settings” application from the Linux distro App drawer and Navigate to the “Displays” or “Screen Display” section.
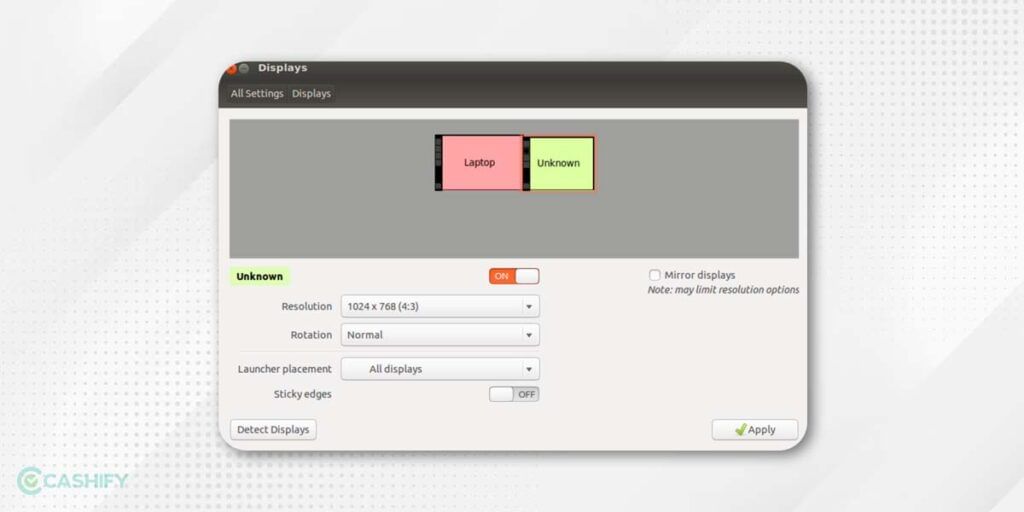
2. Click on the “Detect Displays” button. This should detect the projector and display it as a new display option.
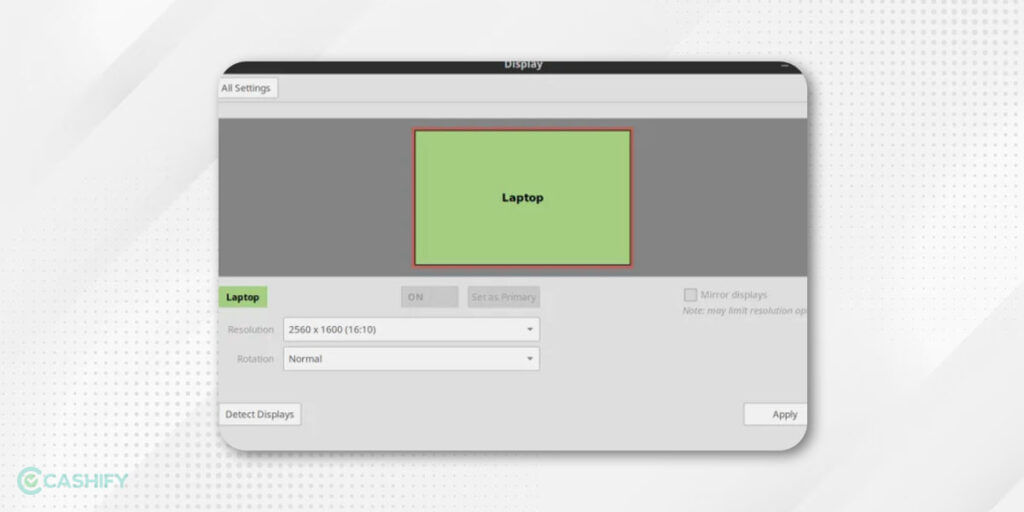
3. Select the projector display option and adjust the resolution and orientation settings as needed.
4. Click “Apply” to save the changes and enable the projector display.
Note: The specific steps may vary slightly depending on the Linux distribution and desktop environment you are using.
Once you have adjusted the display settings, it’s time to test the connection. Turn on your laptop and check if the image is being displayed on the projector. If the image is not being displayed, check the cable connections and the display settings on your laptop.
Also read: How To Use Android Phone As Laptop Speaker?
Step 6: Start Projecting Your Content
Once the laptop is connected to the projector and the display settings are adjusted, you can start sharing your content on the big screen. Open the presentation, video, or image you want to share and start presenting. You can use the laptop to control/navigate the presentation or connect a wireless mouse to make it easier to navigate.
Also Read: How To Fix Windows Blue Screen Errors?


